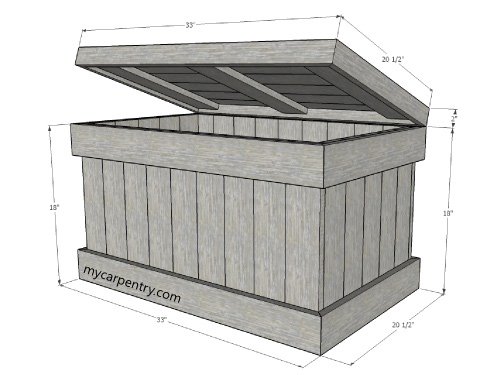
Cedar Chest Plans
These cedar chest plans are perfect for building a simple container for storing loose things. I constructed this cedar chest as a place to store our collection of birdseed and other birding supplies. I plan to build another one for jeans and T-shirts.
One of the great things about this simple woodworking project is that it was almost free since I built it entirely from old fence boards. The only cost was roughly $2.00 worth of finish nails.
Building the Cedar Chest
The dimensions on these cedar chest plans assume that you are working with cedar planks that are 3 1/2" x 3/4". I based the length (the long side) of my cedar chest by measuring the width of nine 18" cedar planks positioned side-by-side (measuring a total of 31 1/2").
Likewise, I based the width (the short side) by measuring the width of five 18" cedar planks positioned side-by-side (measuring a total of 17 1/2"). The 18" planks, on both the sides and the ends, are held together by mitered planks nailed on the top and the bottom. This design will make more sense as you read further.
Material List
* The lengths given are from the long points of the mitered ends.
Cedar Chest Plans - Assembly
Sides (refers to the longest vertical part of the cedar chest) - Cut enough 18" planks to build both sides (18). Cut the top and bottom mitered trim pieces @ 33". Place 9 of the 18" planks side-by-side on a flat surface. Use a framing square to ensure that they are square.
When assembled, the short points of the mitered trim cuts should meet even with the edges of the 18" planks and be flush on the top and bottom. Use 1 1/4" galvanized nails or screws to attach the mitered trim pieces to the 18" planks. See the diagrams for details.
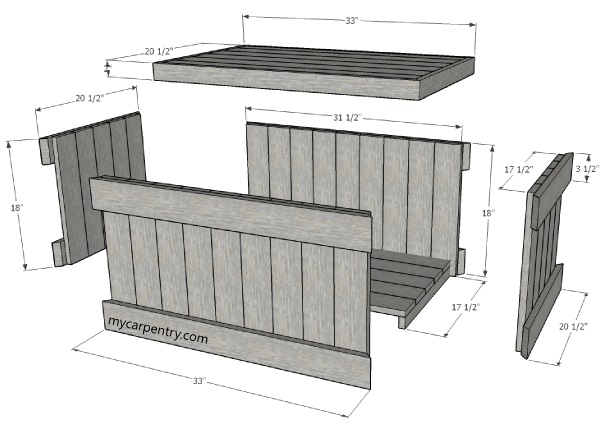
Ends (Refers to the shortest vertical part of the cedar chest) - Cut enough 18" planks to build both ends (10). Cut the top and bottom mitered trim pieces. Lay 5 of the 18" planks side by side on a flat surface. Use a framing square to ensure that they are square.
When assembled, the short points of the mitered trim cuts should measure 3/4" from the edges of the 18" planks and be flush on the top and bottom. Use 1 1/4" galvanized nails or screws to attach the mitered trim pieces to the 18" planks. The diagrams below show the unattached and attached views to show how the sides and ends fit together.
Bottom Cut five of the cedar planks 30" long. Rip one of the planks 1 1/2" wide. Cut it into three pieces 17 1/2" long. Lay the five 30" planks side-by-side and square them. Attach the 30" long planks to the 17 1/2" rips (shown below) using 1 1/4" galvanized nails or screws.
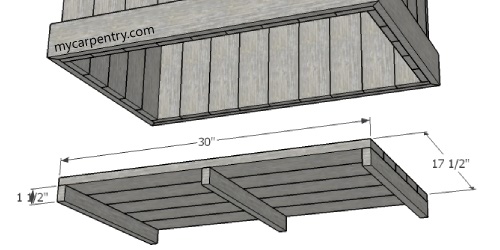
Position the assembled bottom inside the sides/ends assembly and secure it with galvanized nails/screws.
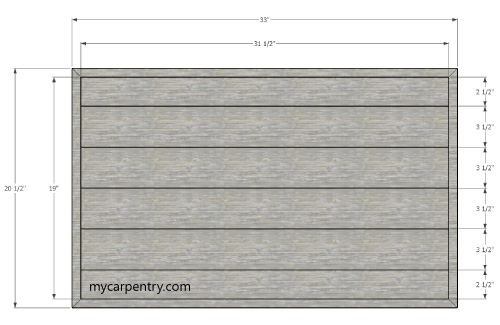
Top Cut six of the cedar planks 31 1/2" long and rip two of the planks 2 1/2" wide. Lay out the planks with the narrowest ones on each end and square them with a framing square. Cut three planks 19" long and slip them underneath the top boards and nail/screw them together. The 19" planks (not shown) secure the top planks together underneath.
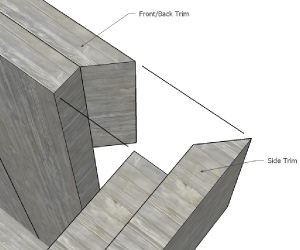
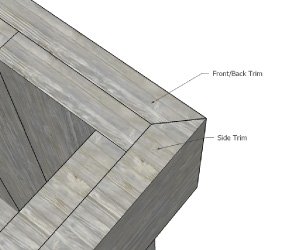
From cedar planks ripped down to 2", cut two of them 33" (long-point to long-point) and two of them 20 1/2" inches (long-point to long-point). Secure them to the top assembly (as shown in the diagram below).
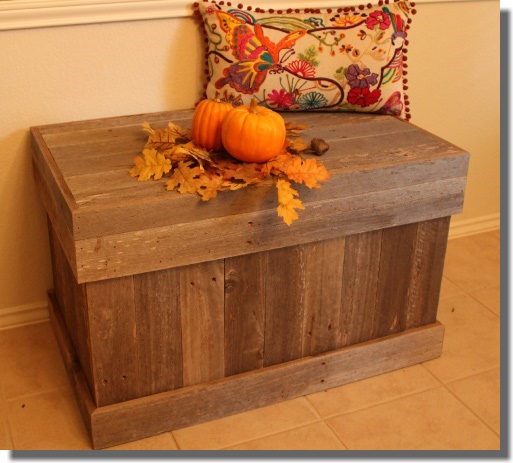
Success!
I purposely did not add hinges to secure the finished top to the chest. I have it just sitting on top. If you decide to add hardware to these cedar chest plans, there are many variations of hinge/latch combinations to choose from.
I hope you found these cedar chest plans useful. If you have any questions about these or anything else on mycarpentry.com, please don't hesitate to contact us.
Woodworking Projects - See more woodworking projects on mycarpentry.com.
DIY Projects - Check out more DIY projects on mycarpentry.com.
Outdoor Furniture Plans - Learn about our outdoor furniture plans.
What next?
Leave cedar chest plans and visit our home page.