Free Picnic Table Plans
These free picnic table plans are common styles you can build in less than a day. A picnic table will provide many years of service to your backyard barbecues, parties, and picnics with proper care and maintenance.
These plans provide all the information you need to build each picnic table from the ground up. Each picnic table plan provides a complete material list and step-by-step instructions on how to cut and assemble each piece.
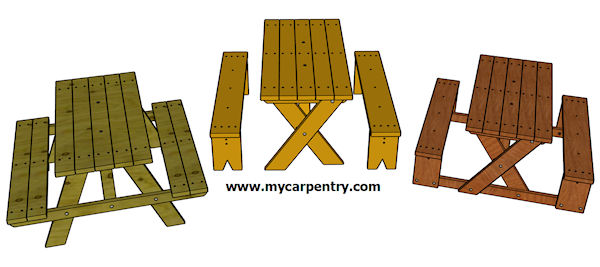
Free Picnic Table Plans
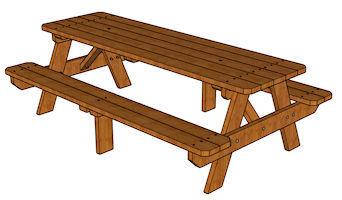
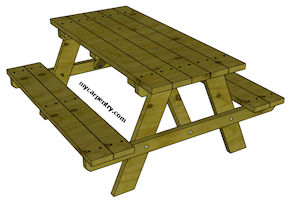
8-Foot Picnic Table - this extra-long picnic table plan is designed for folks with large families or with many friends who need extra seating space for their backyard barbecues and assorted social occasions.
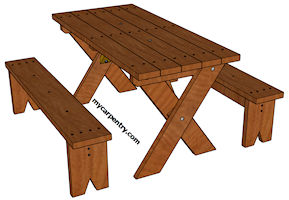
Picnic Table Plan with Detached Benches - this three-piece picnic table plan provides extra flexibility for backyard parties since the benches are not attached to the picnic table like they are in the all-in-one styles.
All-in-one picnic Table - this all-in-one picnic table design was inspired by an RV park we visited while traveling the beautiful highways of North America. All of the park's picnic tables were these same all-in-one designs.
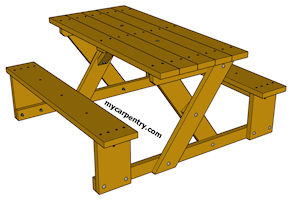
Classic all-in-one picnic table - this all-in-one classic picnic table design has been around for many years, and we're here to ensure it stays around a lot longer!
Picnic Table Lumber
You can use any species of wood you want when building these picnic tables, but your picnic table will last longer if you use wood such as western red cedar, redwood, or treated pine. Treated pine lasts the longest, but cedar and redwood are fine choices.
Western red cedar and redwood are excellent choices for picnic table wood because of their natural resistance to decay. They will last even longer if you seal the wood with a stain/sealer made for the species of wood you choose for your picnic table project.
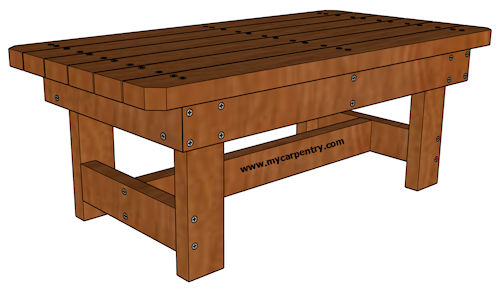
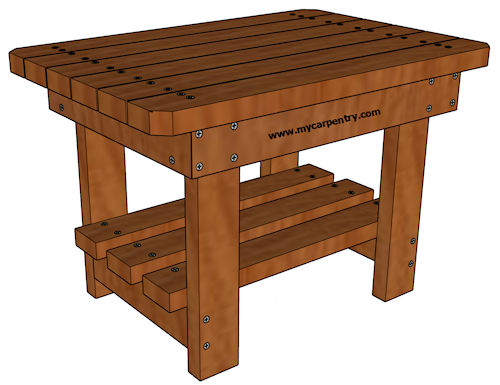
I built a patio cover years ago using western red cedar and sealed it with a cedar stain, and even after ten years, the wood still looks just like new. I also built an end table and coffee table for my patio from the leftover cedar and used the same sealer/stain on them both, and they also look just like they did on day one.
Sealing the wood with a stain/sealer will make the wood darker. The more sealer you apply, the darker the wood becomes. That has been my experience.
After building my wood outdoor furniture, I applied one good coat of sealer, then after a month or two, applied another coat. After one year, I would apply yet another coat, even though it might not have needed it. The sun bleaches the color of the wood and dries it out. When I see this start to happen, I know it's time to add another coat.
Treated pine is my lumber of choice for deck framing, not only because it is required by building code but because it is very resistant to decay - it can also be a good choice for picnic tables for the same reason since your picnic table will probably spend most of its time outdoors.
If you choose treated pine, ensure you use materials with an arsenic-free method suitable for picnic table use. I recommend using a plastic tablecloth so you aren't eating directly off the table. A tablecloth will also protect your picnic table from food.
You can also use a combination of treated pine and cedar or redwood for your picnic table projects. You can use treated pine for the legs and structure of the table, then use cedar for the tabletop and benches.
More Outdoor Furniture Plans
Check out these two easy projects while you're in the mood to build wood outdoor furniture. They make a fine addition to a patio or deck. The completely free plans are available on this site!
DIY Projects - Visit our DIY Projects page.
Woodworking Projects - Check out more woodworking projects on mycarpentry.com.
Birdhouse Plans - Build a birdhouse to go with your new picnic table.
What next?
Leave free picnic table plans and visit our home page.
Leave free picnic table plans and visit outdoor furniture plans.