Church Birdhouse Plans

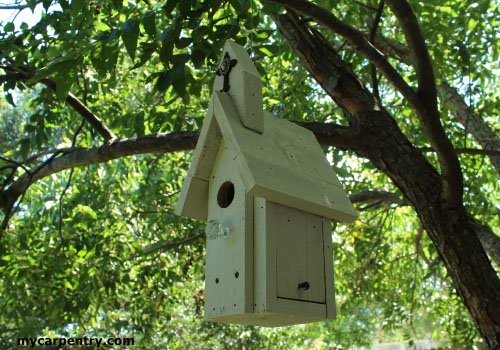
I designed this church-style birdhouse plan for wrens, chickadees, titmice, and finches, but other small birds might find this design suitable for nesting. I used natural western red cedar fencing materials to build this church-style birdhouse. I painted the exterior white but left the inside natural.
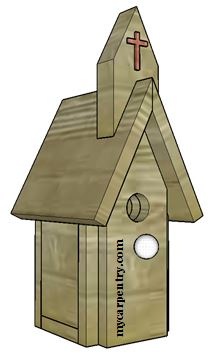
The many small wooden churches we admired en route to countless RV destinations inspired us to create this church-style birdhouse design. I imagine the local carpenters who built these old country churches were respected members of the original congregation. They must have been proud to have been able to make such an exemplary contribution to their community.
Church Birdhouse Plans
I built this church birdhouse from 1x6 cedar fencing, except the front cap, which I made from a piece of scrap 1x4 cedar, and the steeple from a scrap cedar 2x4.
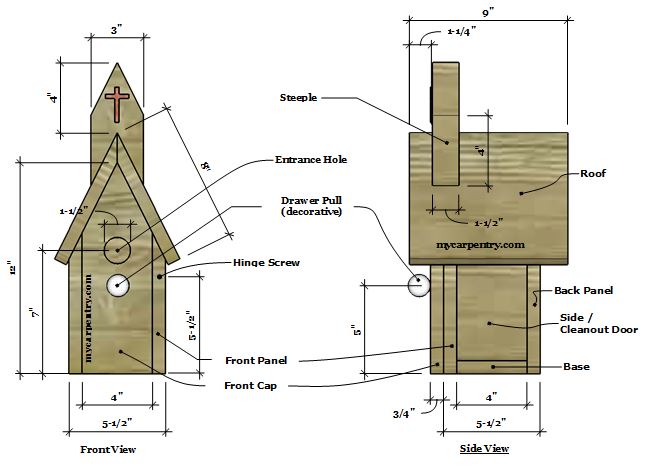
Cut the front, back, sides, ridge beam, and base to the sizes indicated in the church birdhouse plans. Assemble all of these pieces using 16 gauge galvanized finish nails, as shown, except one of the side pieces - the cleanout door.
Attach the side cleanout door using two 1-1/2" galvanized hinge screws positioned 3/4" from each side of the top of the door, screwed in from the front and the back panel (see drawings).
Cut and attach the front cap using 1-1/4" galvanized finish nails. I used shorter nails so they wouldn't poke through the back of the front panel.
Building the Roof of the Church Birdhouse
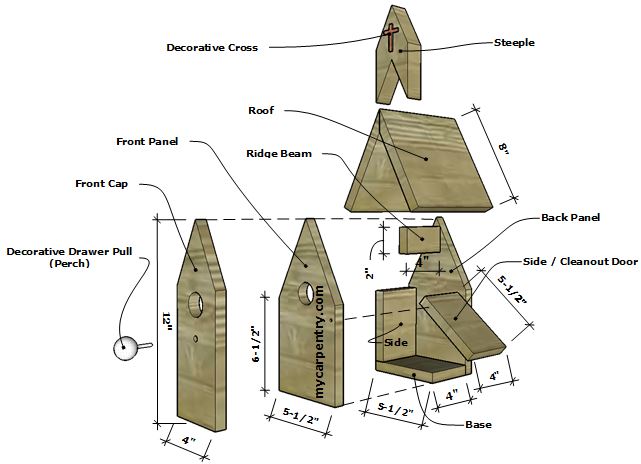
Since the length of the roof slope is 8", you will need to use two pieces of 1x6 material to build each side. First, starting with the peak sections, cut two pieces of 1x6 9" long. The bevel cut at the roof peak is a steep 65 degrees.
I set the Bevel on my table saw at 25 degrees (90 - 65 = 25 degrees) to cut this angle. Next, I aligned the table saw's fence close to the blade (but not too close!) and fed the 1x6 sections (on edge) into the table saw blade to cut the 65-degree Bevel.
Attach the two peak roof sections, centered front to back of the church birdhouse, with 16 gauge galvanized finish nails. To build the lower roof sections, rip some 1x material wide enough to complete the 8" roof slope.
Cut and attach the steeple as shown in the church birdhouse diagrams using the same 16 gauge galvanized finish nails.
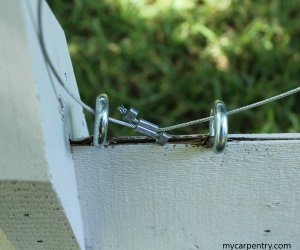
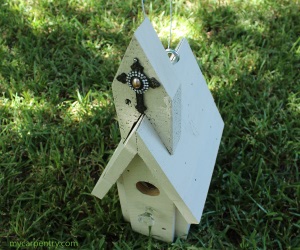
For the hanger - I used some pretty heavy-duty screw eyes (1/4" x 3-3/4") threaded through the peak of the roof into the ridge beam. Next, I ran a 20" piece of 1/16" wound cable through the two screw eyes and connected the ends with a ferrule & stop set (see upper left diagram). I purchased the screw-eyes, cable, and ferrule & stop set at a "big box" hardware store.
The decorative cross on the steeple and the drawer pull used as a perch are optional, along with the antique white paint. But the three accents combined added a charming finishing touch to the country church birdhouse. I purchased the cross and drawer pull from an arts and crafts store.
Visit eBird to learn more about birds and discover the world of birding.
Birdhouse Plans - See more birdhouse plans on mycarpentry.com.
Woodworking Projects - See more woodworking projects on mycarpentry.com.
DIY Projects - Check out the DIY projects on mycarpentry.com.
Outdoor Benches - Enjoy your new birdhouse from a wooden bench you built from plans on mycarpentry.com.
What next?
Leave Church Birdhouse Plans and visit our home page.