Install Ceramic Tile
How to install ceramic tile? Installing ceramic tile can be quite a bit of work (depending on the size of your project), but it can also be rewarding at the end of the job when you are showing off your work to friends and family. Tile installation isn't difficult to learn.
I had never installed a single square of ceramic tile. Nor had I ever mixed grout or thinset. I had no idea how hard or easy this job would be (installing about 800 square feet of tile in my house). I could only work on my ceramic tile project after my day job (during the week) and on weekends (when I was free), so I prepared myself for a somewhat long-term project. I had one goal - take the time to do the job right!!
Before you install ceramic tile, I recommend attending a demonstration at a local hardware store. These sessions took about an hour and were well worth the time. I attended two of them to get the tile installation experiences of more than one instructor.
During the class, the instructor mixed a small amount of thinset mortar (mortar made of cement, fine sand, and a water retention agent). Thinset is used to adhere the tile to the floor. He mixed enough thinset to install about 3 or 4 tiles. He spread the thinset (that had the consistency of peanut butter) on a piece of plywood, using a trowel with 1/4 inch teeth, and demonstrated how to apply the tile to the thinset. He managed spacing between the tiles by using small plastic spacers. This amount of instruction is most of what I needed to get me started.
I highly recommend these courses. If you ask the instructors, they will probably let you mix a little thinset, apply it to the test surface, and install a few tiles. By doing this, you get the feel of the thickness of the thinset and how to trowel the thinset to the floor.
Install Ceramic Tile - Tools
Tile Saw - You can buy an inexpensive tile saw (like the one shown below) for around $100, which will be more than adequate for small tile projects. I used this one to install ceramic tile in almost half of my house, and it still has plenty of life left in it.

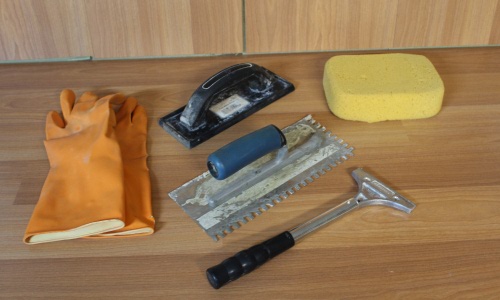
Razor Blade Scraper - If you want to replace an old floor with tile, you must prepare the surface so it is smooth and level before you install ceramic tile. A 4-inch razor blade scraper is perfect for scraping off old glue and paint.
Thinset Trowel - I used a 1/4-inch square-notch trowel (shown with a blue handle below) for applying the thinset to the floor.
Grout Trowel - The grout trowel has a smooth rubber surface designed to fill the space between the tiles with grout. You will want to use gloves while grouting because you use a wet sponge to remove excess grout and residue from the tile. The cement in the grout quickly dries out your skin.
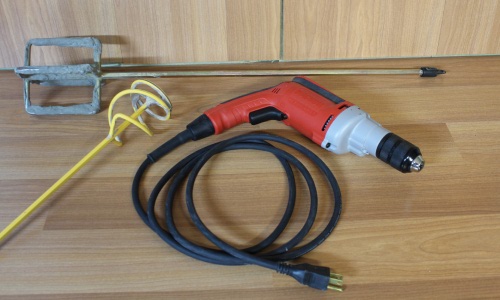
Drills and Mixers - I learned that mixing grout with a heavy-duty industrial drill, like the Milwaukee 1/2 Inch Magnum - using a couple of different mixing paddles - was the only way to go. The low speed and high torque of the Milwaukee Magnum made it the perfect drill for the job. My 3/8 inch high-speed drill, which I use for most projects, would not have had the power to turn the mixing paddle in the thick thinset.
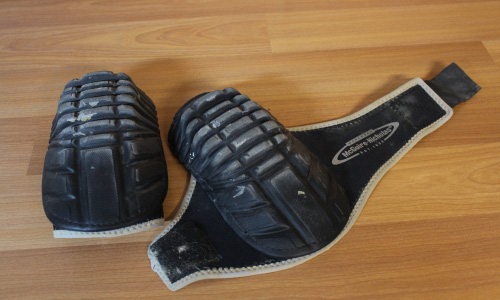
Knee Pads - Knee pads are a must-have tool for installing ceramic floor tile. You spend most of the time on your knees when you install any flooring. A good pair of knee pads will save those precious knees!
Install Ceramic Tile - Floor Prep
The hardest part of the job was preparing the floor for my new ceramic tile. I was replacing a ten-year-old vinyl floor with plenty of life left in it.
I used a couple of razor blade scrapers and lots of muscle to remove the old flooring. In the middle of the vinyl removal phase, I thought there must be an easier way to do this. I found a product at a hardware store that came in a gallon jug made for this exact purpose.
You apply the substance to the vinyl and let it soak in. After about 30 minutes, the vinyl was considerably easier to remove. I applied a layer of the vinyl remover - using a paintbrush - on about 1/3 of the remaining vinyl, let it soak in, and removed the vinyl. The product warning label recommended lots of ventilation, although the product didn't have much of a smell (if any). Nevertheless, I opened all of the windows in the room and turned on the ceiling fan.
After removing the vinyl from the area where I had applied the remover, I mopped the floor several times with clean water to remove the vinyl remover substance. Several hours later, after dinner and a movie, a high-pitched sound suddenly blasted through our living room. It seemed to come from everywhere. My wife and I were frantically trying to determine the source of the sound.
After about 10 minutes, we noticed our forgotten carbon monoxide detector was the source! We had never heard it before, so we didn't know what it sounded like. There must have been fumes from the vinyl remover that set it off. After that day, we were afraid to use the remover again, so we returned to the old labor-intensive method of removing the vinyl - scrapers and muscle.
With the old flooring removed, I mopped my floor several times with plain hot water to remove any remaining vinyl adhesive and floor cleaner residue.
If your floor has uneven areas, this is the time to apply a floor leveler. You can find this in the flooring section of your favorite hardware store.
Install Ceramic Tile - Layout
Installing ceramic tile is one of those construction projects where you start in the middle of the room and work toward the outer walls. If you were to start along one wall, you might wind up with an ugly sliver of tile near a doorway or other wall. Carefully planning the placement of the first tile will help prevent this.
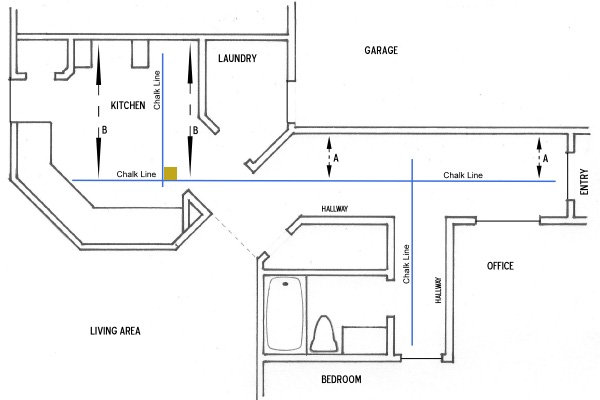
I picked the longest stretch of wall on my tile project (below) and measured out far enough from it (A) so that I could pop a chalk line (x) from the end of the hallway through the kitchen. I used this line as my control line to determine how the tiles would land against all the other walls and doorways.
I also measured the distance between the chalk line and kitchen wall (B) to ensure the measurements were the same. I could determine where my tiles would land by measuring at various points along the chalk line.
I also did this in the other direction by popping a perpendicular chalk line and measuring out from it to determine the (y) dimension of the placement of the first tile.
Once I had determined where the first tile should go, I popped new chalk lines to use as a guide for installing my tile.
The floor plan below shows the 12-inch tiles installed in their approximate locations. Careful planning ensured that I did not have any strips of tile less than 3 inches in width next to any wall or doorway. The orange square indicates the location of my first tile.
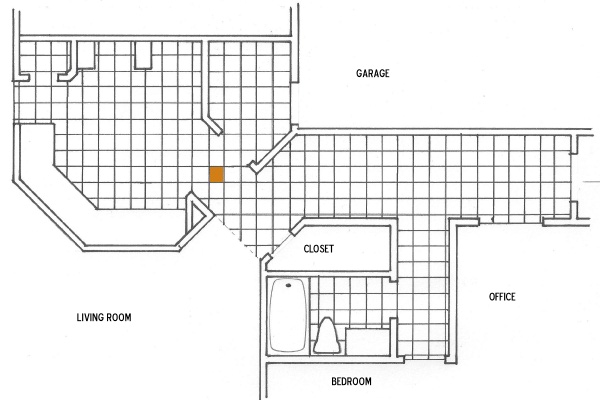
I installed the first ceramic tiles along the chalk line that extended through the hallway. This way, I could install three rows of tiles while using the remaining 2.5 feet of hallway space as my work area. Later, after the thinset under the first tiles had hardened, I used them as my work area while installing ceramic tile in the remainder of the hall.
Install Ceramic Tile - My Advice
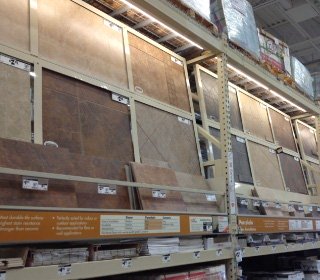
When you purchase ceramic tile, make sure that all of your tiles are from the same lot. The variance between lots can be significant - tiles from a different lot might appear to be a completely different tile. It happened to me. I got home with a full pallet of tile to discover it contained tiles from two separate lots. I took it back.
When you install ceramic tile, purchase enough tile (from the same lot) to do your whole project with several tiles left over to use as spares. I had to call several stores to find one that had enough tile from the same lot to do my whole project.
If you are installing floor tile, use dark-colored grout. Keeping light-colored grout clean and free from stains is difficult.
Clean all of your tools thoroughly after each day's work. Concrete will build up on the tools over time, eventually making them unusable.
If you have any questions about how to install ceramic tile, don't hesitate to Contact Us.
DIY Projects - Check out more DIY projects on mycarpentry.com.
Woodworking Projects - Use old fence boards to create one-of-a-kind crafts.
Wooden Bench Plans - Build a new bench for your backyard with the old fence boards.
What next?
Leave Install Ceramic Tile and visit our Home Page.