Installing Crown Molding
Learn about installing crown molding by understanding a couple of easy-to-learn carpentry skills - how to cut crown molding with a miter saw - and how to cope the inside joints.
The tools that are required to install crown molding are:
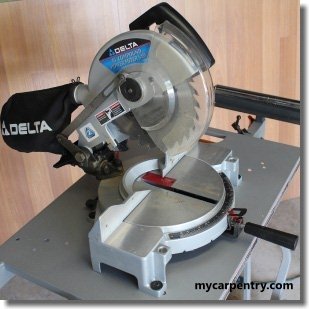
- Miter Saw (or Miter Box)
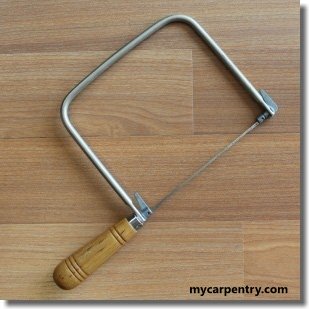
- Coping Saw
- Trim Hammer
- Tape Measure
- Nail Set
- Finish Nails
You can use a pneumatic trim nailer to fasten your crown molding (if you have one), but it isn't required. Alternatively, you can use a trim hammer to drive in the finish nails and then use a nail set to counter-sink the nail heads.
How to Cut Crown Molding
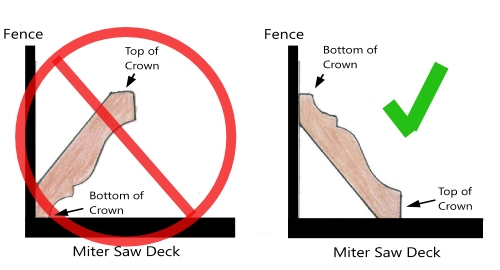
To cut crown mold, position the molding upside down on your miter saw (or miter box). With the molding positioned upside down, both surfaces of the crown molding should be held tight against two faces of the saw - one surface resting on the saw's table - and the other surface resting against the saw's fence. Control of the molding on the saw's surfaces will ensure an accurate cut.
If you have a couple of pieces of scrap crown molding to use for testing purposes, it might save you some material while you are learning the techniques.
The best way to cut inside joints on crown molding is to cope them with a coping saw. Simply cutting two 45-degree angles on inside crown molding joints usually results in an unwanted gap between the two pieces of molding. You can solve this problem by coping the inside joints.
Check out this video about installing crown molding to learn how to cut and cope inside crown mold joints, or read the detailed explanation below.
Installing Crown Molding - How to Cope Joints
Note: This section assumes you are working with 90-degree corners.
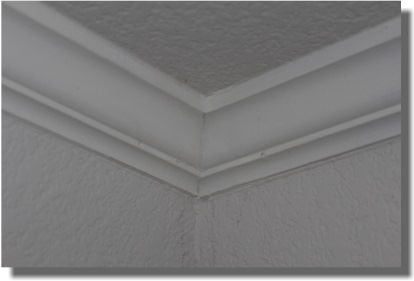
Coping works only on inside joints. A finished coped joint should look like 45-degree angles had been cut on the two pieces of molding (without the unwanted gap). Cutting the first piece of crown molding is the easiest. Cut a straight 90-degree angle on the end of the first piece of crown mold. This piece will butt against the corner of the two walls and the ceiling. Before nailing it in place, cut and cope the second piece of crown molding (described below).
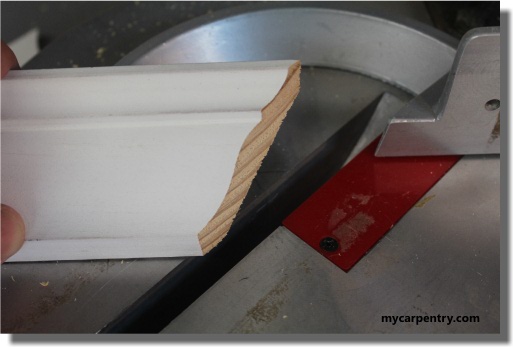
To cut the second piece of crown molding, place it upside down on your miter saw, ensuring the flat surfaces of the crown mold are tight against the deck and fence surfaces of your miter saw. Make a 45-degree inside cut with a miter saw (or miter box).
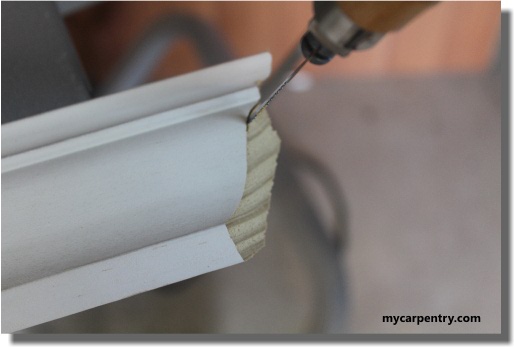
Using a coping saw, cut along the line that separates the face of the crown molding and the 45-degree cut face. While cutting, angle the coping saw towards the back of the crown mold to remove any wood that might be in the way of the coped joint. (see below)
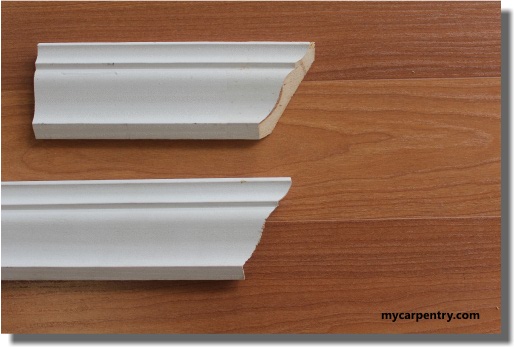
Compare the 45-degree miter cut (top) to the coped miter cut (bottom). Once the miter cut has been coped, it should fit tightly against the first piece of molding.
Before nailing either piece of molding, hold them in the corner, against the wall and ceiling, and shift them around until both pieces fit perfectly together. Fasten the 90-degree piece in place, then hold the coped piece tight against the first piece and nail it. The finished joint should look like you had cut a 45-degree angle on both pieces.
Painting and Crown Molding
If you plan to paint the room where you want to install crown mold, paint the room first. If the ceiling and the walls are two different colors, you don't have to be too precise when cutting in the edge of the ceiling with a paintbrush. The crown mold will cover it up.
You can also paint the crown mold before you install it, then nail it in place, set the nails, putty the nail holes, and perform any necessary touch-up afterward. If you have any questions about how to install crown molding, please feel free to Contact Us.
A quick thought about miter saws: I installed 2 1/2" crown molding using the 10" model shown in the pictures, but when I buy my next miter saw, I will get a larger one (similar to the one shown in the link below) because I want to be able to cut 1x6s and 4x4s, etc. It all depends on what you plan to use it for.
DIY Projects - Check out more DIY projects on mycarpentry.com.
Woodworking Projects - Use old fence boards to create one-of-a-kind crafts.
Wooden Bench Plans - Build a new bench for your backyard with the old fence boards.
What next?
Leave installing crown molding and visit our home page.