Rustic Dining Table
How to Build a Rustic Dining Table
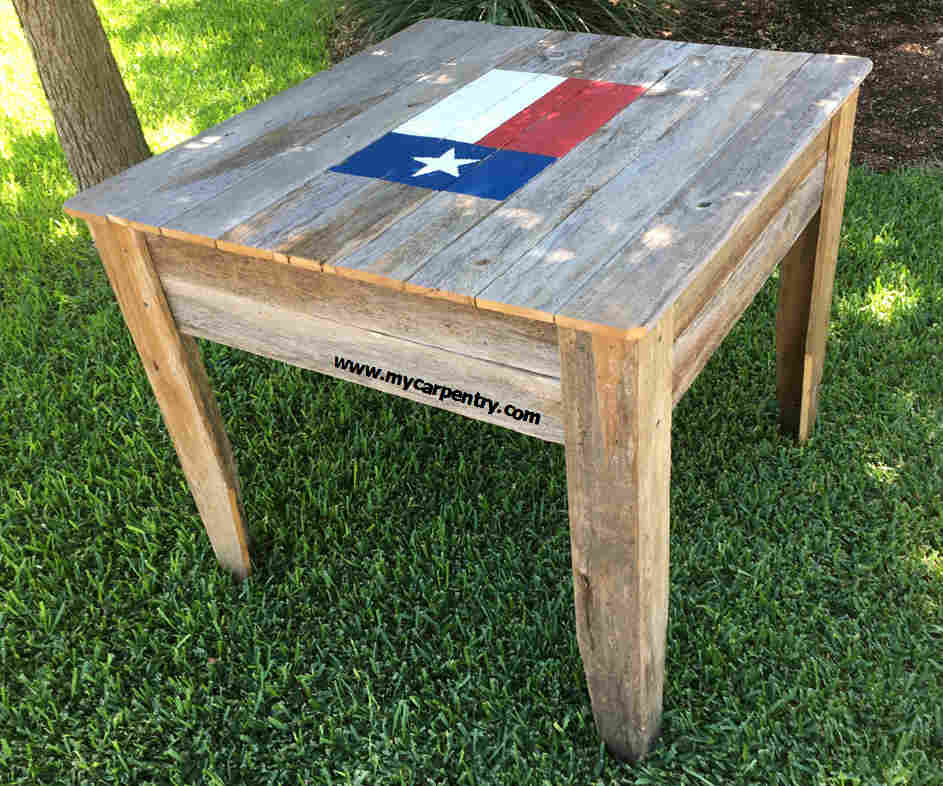
I built this rustic dining table from several cedar fence boards that I salvaged while I replaced my 20-year-old privacy fence. When you use recycled building materials for your woodworking projects, you can significantly lower the cost of building materials. I built this table, plus a rustic wooden bench, for less than $5 worth of nails and screws.
Note: The fence boards used in these plans were almost exactly 4 inches wide and 3/4 inches thick. The material list and table dimensions take this into account. Verify your material sizes and make any necessary adjustments to the plan before you start cutting the pieces.
Rustic Dining Table (Materials List)
| Description | Size | Quantity |
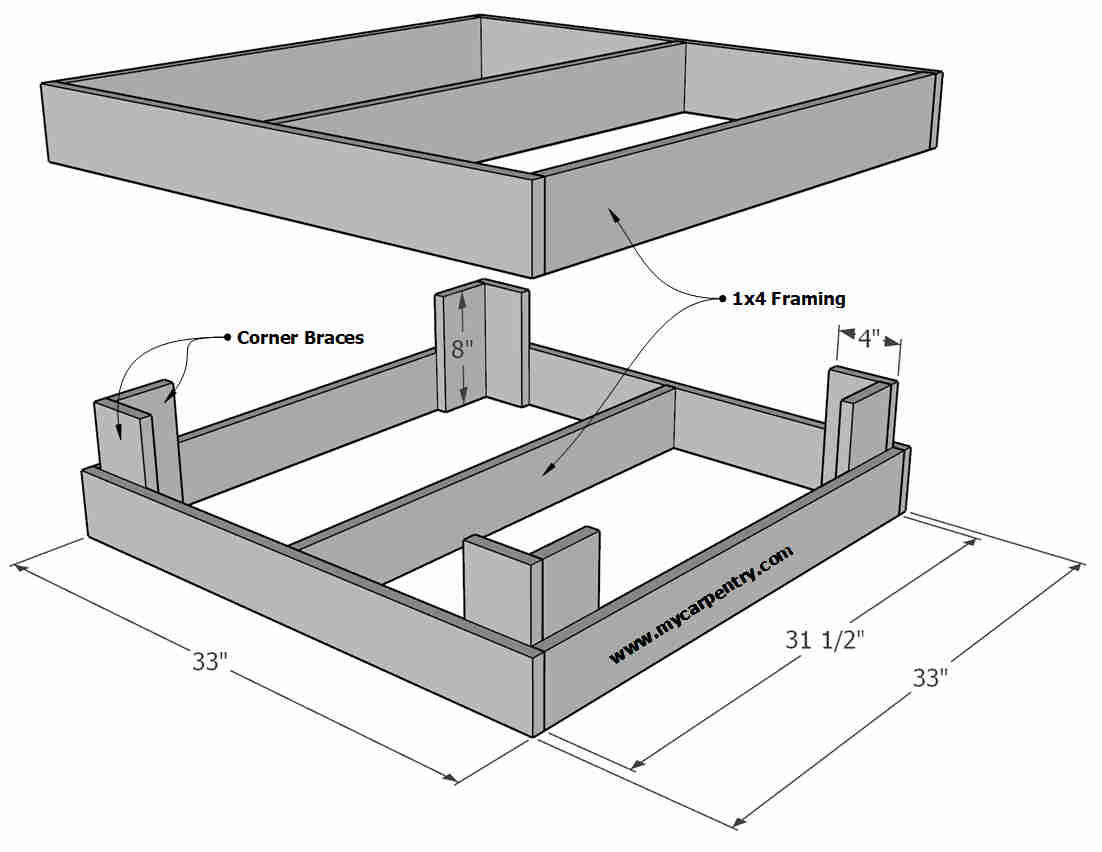
| Frame (front and back) | 1x4x33 | 4 |
| Frame (sides and center) | 1x4x31.5 | 6 |
| Frame blocking | 1x4x8 | 8 |
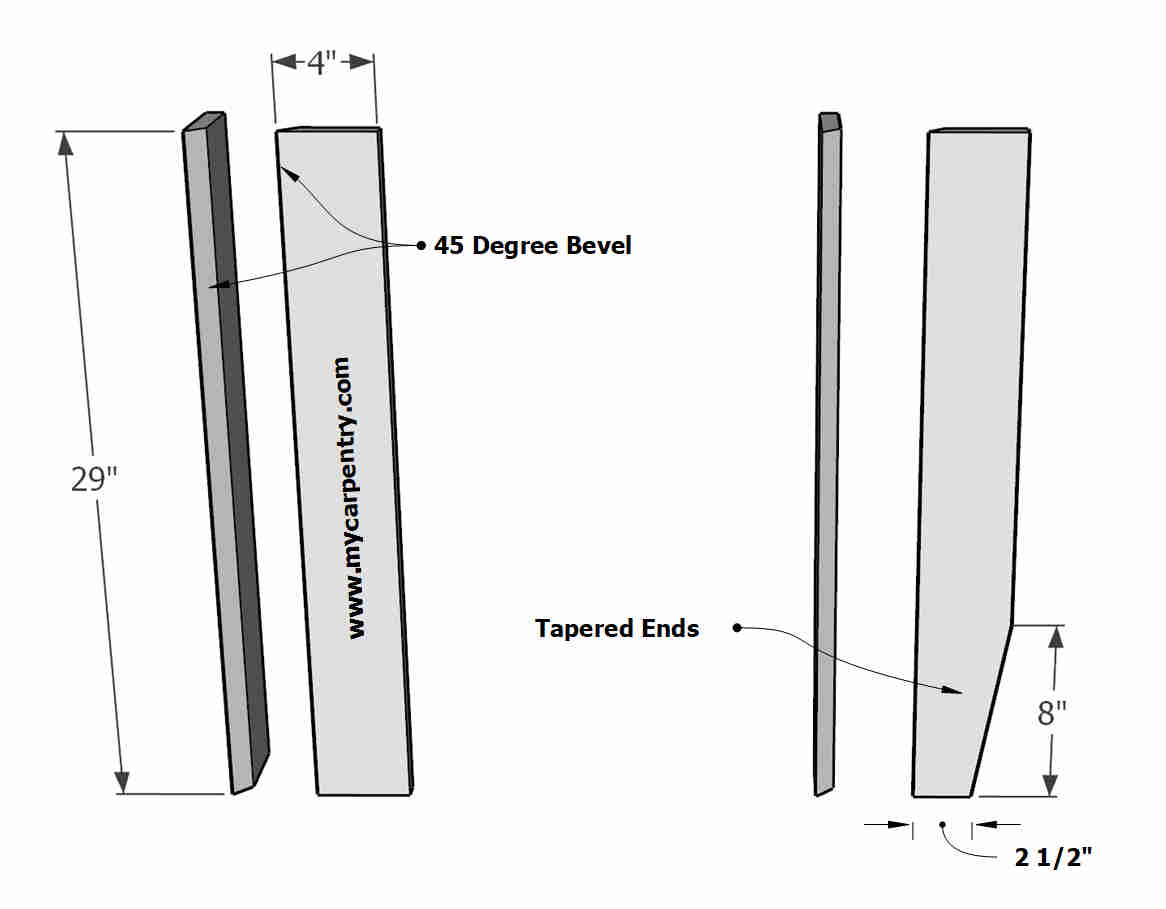
| Two-Piece Legs | 1x4x29 | 8 |
| Table Top | 1x4x36 | 9 |
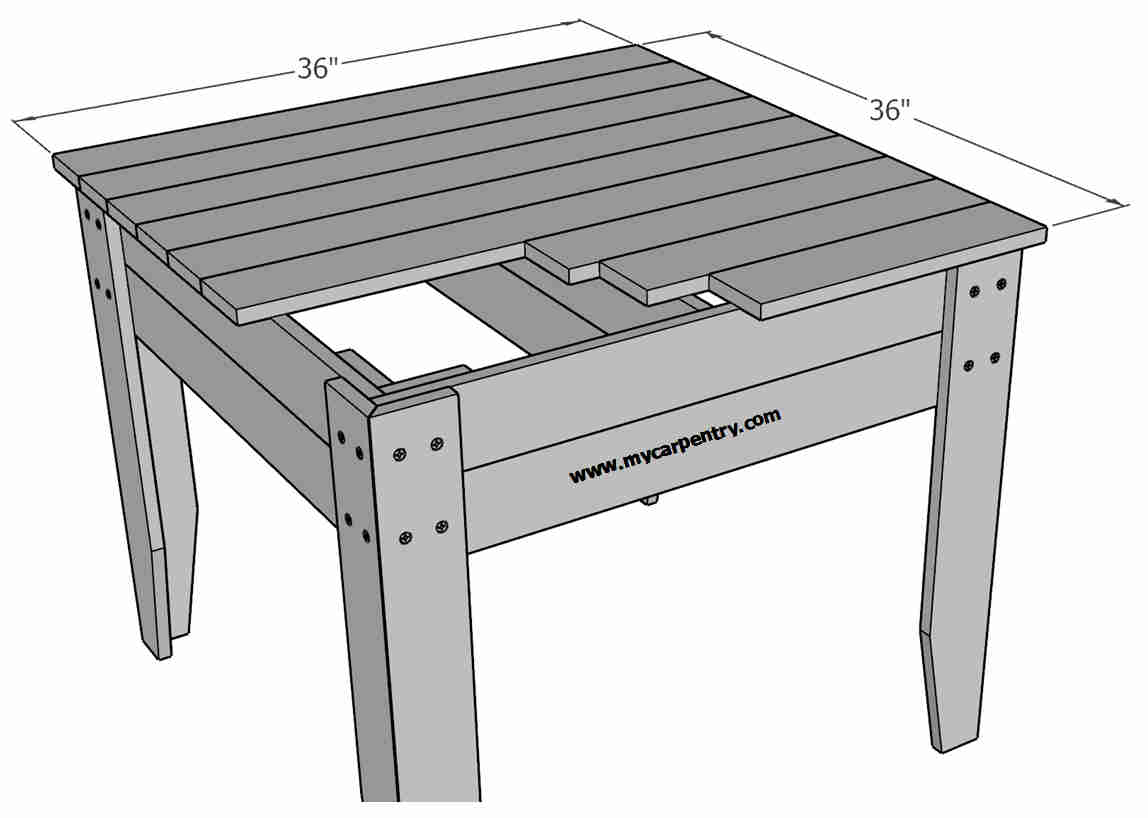
* To provide about 1 1/2" of overhang on the table top, I made the finished dimensions of the frame 33" x 33", so that once attached to the frame, the nine 4-inch wide table-top boards (measuring a total of 36 inches) would produce the planned 1 1/2" overhang on all four sides.
Note: I used 16-gauge 2-inch galvanized Porter Cable finish nails to attach all of the pieces of this rustic dining table. Once I completely assembled the table, I reinforced the two-piece table legs with 2" wood screws as indicated in the drawings. It is perfectly acceptable to use different fasteners to build this bench (as you might wish to do). You can also use exterior wood glue to adhere all the pieces before nailing them with finish nails. The wood glue would add extra strength to the table.
Building the Rustic Dining Table
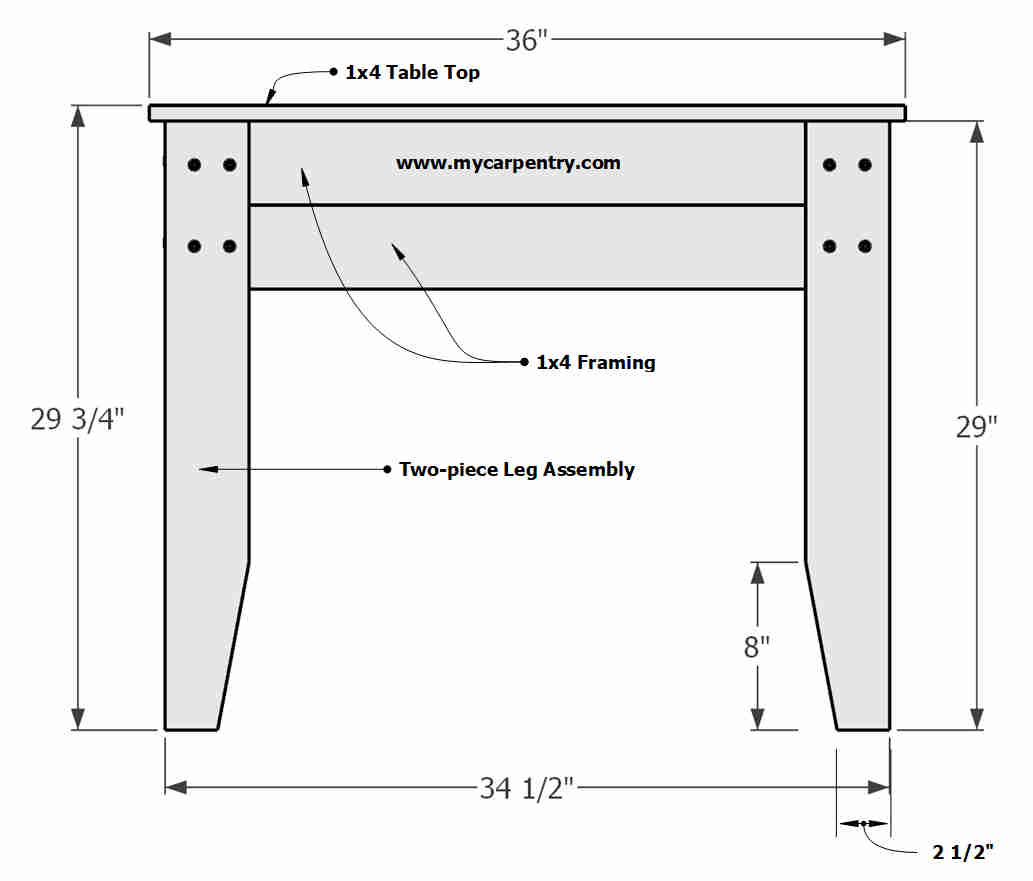
Assemble the two 33" square box sections - of the table's frame - as indicated in the diagram below. Place one section on top of the other and secure them together using the eight 8-inch frame-blocking pieces placed on the inside corners of the two sections.
To create the four legs, cut eight 1x4s @ 29 inches long (use two 1x4s to build each table leg). Cut a 45° bevel angle along one edge of each 1x4. Attach the beveled edges of the two 1x4s to create the four legs. You can taper the bottom ends of each leg (as shown in the drawings), but this is not required.
Attach the assembled legs to the table frame with a combination of finish nails and 2-inch wood screws (as indicated in the drawing below).
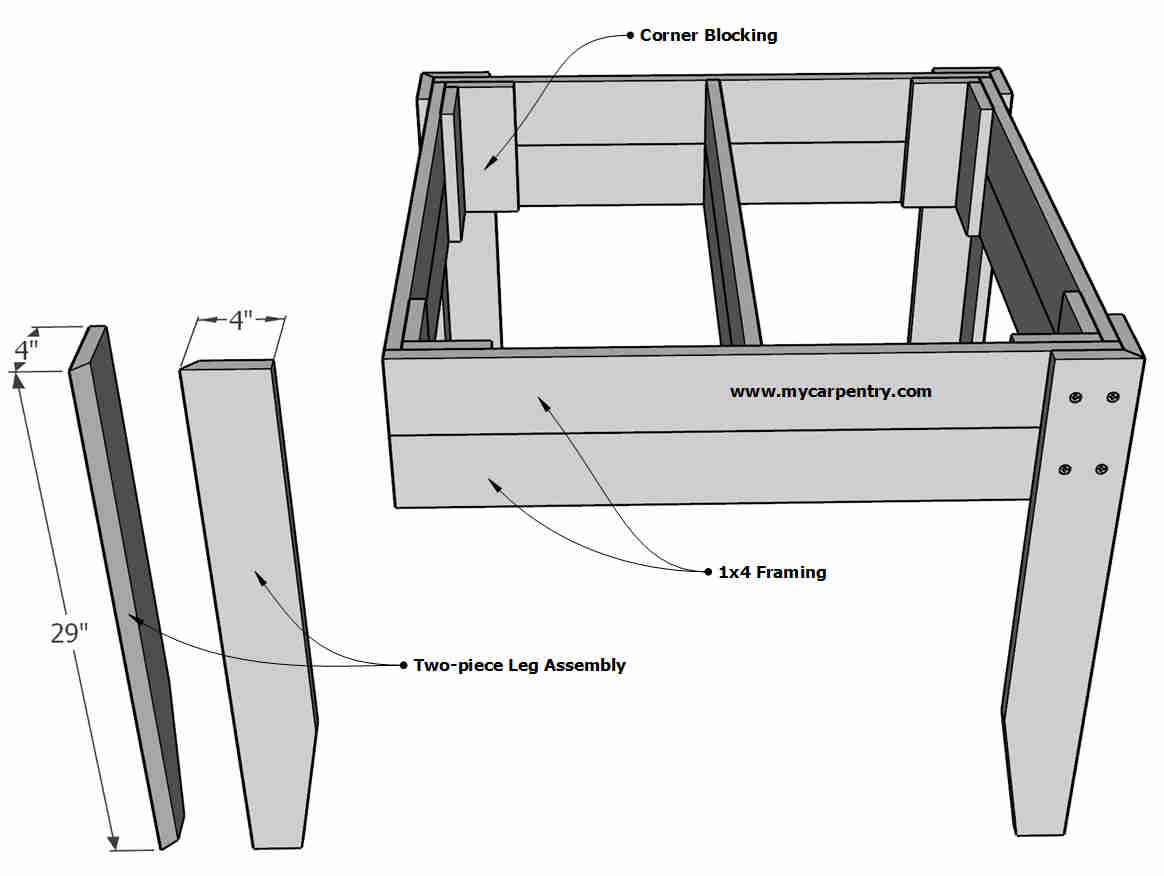
Square the frame using a framing square. Or you can alternatively cross-measure the opposing corners - if the measurements are equal, the frame is square. If not, tweak the frame until they are.
Cut the nine 36-inch 1x4s and lay them on the top of the finished frame. Align them from side to side and from front to back so that the overhang is even on all sides. Fasten them to the frame using the recommended finish nails or similar.
Rustic Dining Table - Elevation
The diagram below shows the finished dimensions of the 36" x 36" dining table. Once you see how the pieces go together, you might decide to make your table larger or smaller, depending on your needs and the available sizes of your recycled building materials.
You can cut the legs of this rustic table short to use as a kid's table, a card table, or even an extra work surface in your garage. You can leave the table's surface unpainted or undecorated.
I chose to customize my new table with the Texas state flag. I used a framing square and carpenter's pencil to lay out the flag and used exterior latex paint for each color.
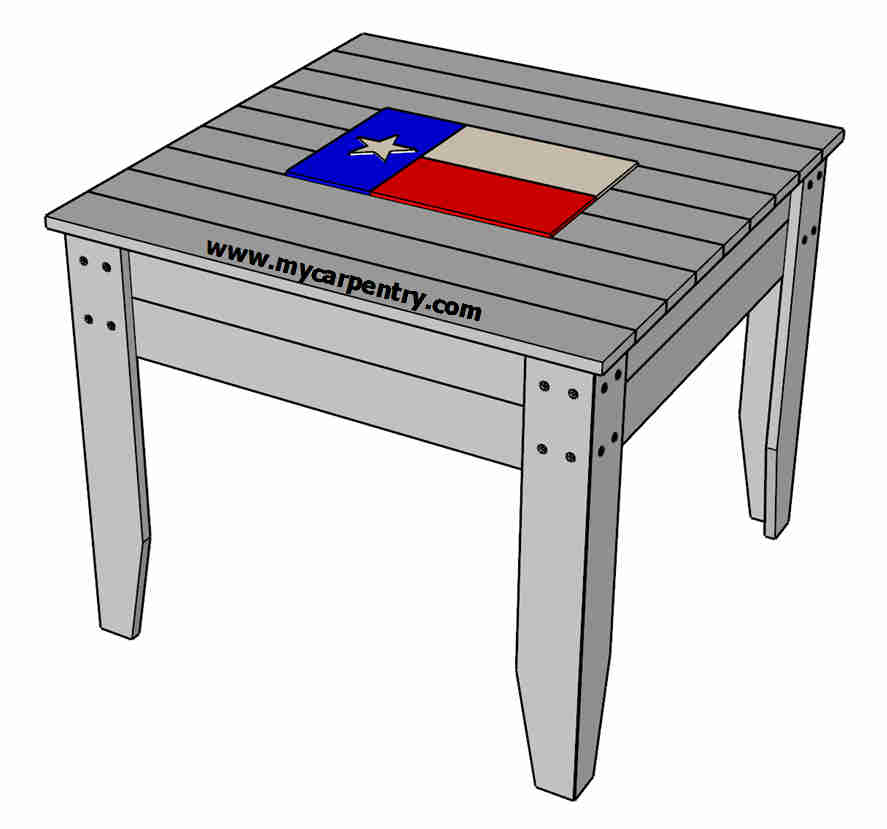
The Texas Flag
The Texas flag is probably one of the simplest U.S. state flags to draw. All the rectangles that make up the flag are proportionally the same size. They are each twice as long as they are wide. The diameter of the 5-point star is 3/4 of the width of the blue section and centered from top to bottom. The white rectangle is above the red rectangle.
Woodworking Projects - See more woodworking projects on mycarpentry.com.
DIY Projects - Check out more DIY projects on mycarpentry.com.
Outdoor Furniture Plans - Learn about our outdoor furniture plans.
What next?
Leave Rustic Dining Table and visit our home page.