Rustic Picture Frames
I love to make rustic picture frames out of old fence boards. It is a much better use for seasoned wood than tossing it in the landfill. Fence boards are naturally weathered, making excellent material for creating rustic home furnishings, outdoor furniture, and other small woodworking projects.
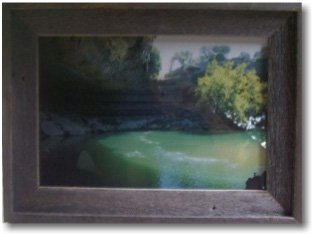
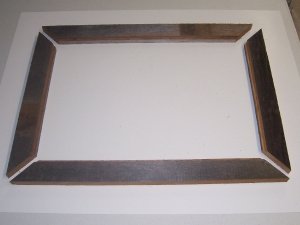
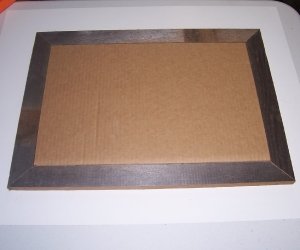
The goal is to build a rustic cedar picture frame around a 12" x 18" enlarged photo (shown above).
The only materials required are:
- Two 1" x 4" x 6' cedar fence boards
- One 12" x 18" piece of glass
- One 12" x 18" piece of cardboard (for backing)
The tools that I used to build my frame are as follows:
- Table saw
- Router
- Miter saw
- Finish Nailer
Pick out a couple of straight, used fence boards. When making picture frames from fence boards, used ones are the best. They have much more character than the new ones, and using them for another purpose - after they have served their usefulness on the fence - provides continued value.
Making Rustic Picture Frames
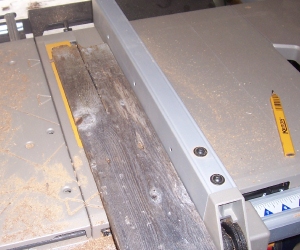
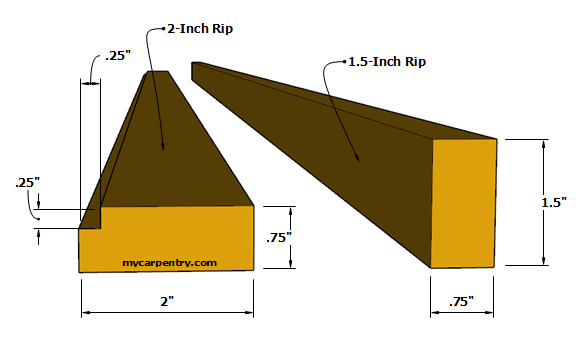
Use a table saw to rip both fence boards at around 2 inches. You should end up with one piece about 2 inches wide (the inside part of the frame) and the other about 1.5 inches wide (the outer part of the frame).
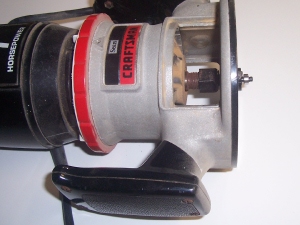
Insert a .25" rabbet bit in your router, and adjust the depth to .25". I use this size rabbet cut when making picture frames because of the thickness of a 1/8" thick piece of glass and picture (which hardly has any thickness), and cardboard backing when inserted into the frame, is almost flush with the back of the frame. You'll see this come together in some later steps.
Make a rabbet cut along the length of both 2" wide rips (see image below).
The rabbeted board will form the inside part of the frame. The glass, picture, and cardboard backing will fit into the groove.
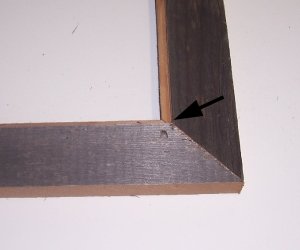
The key to making perfect rustic picture frames is to measure the frame parts from the points indicated below. First, determine the precise dimensions of the glass - you can cut the picture and the cardboard backing if needed, but the glass would be more difficult.
Assuming that the glass is exactly 12" x 18", measure and mark your frame parts 12 1/8" and 18 1/8". Using a miter saw, cut a 45-degree angle on each end of each piece (see diagrams).
Once you have the pieces cut, assemble them on a flat surface and, before permanently attaching them, lay the piece of glass in the rabbeted cut to ensure your frame is the correct size. If it is a little bit larger - that is good, but you don't want it too large. If the glass, when slid off to one edge, leaves a gap on the other side of the frame, the frame is too large. Cut a little off the frame parts, as needed, for a good fit but not too snug. You don't want to force the glass in the frame.
Once the frame pieces are the size you want, attach them using a finish nailer, such as the one shown below.

Next, using your miter saw again, cut the outer part of the frame (the 1.5" part). It should wrap around the inner part (as shown below). Attach with the finish nailer.
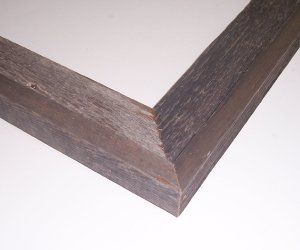
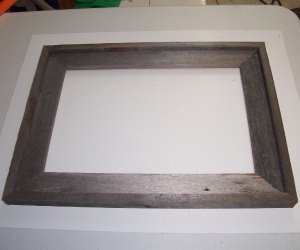
Once completed, the frame should appear as shown below. If both sides are the same length and the top and bottom are the same length, the frame corners should be square, and the 45-degree joints should be tight.
Next, cut a piece of cardboard to use as backing for the picture. The purpose of the backing is to hold the photograph tight against the glass so that there are no ripples in the photo.
Next, insert the cleaned glass, picture, and cardboard backing into the rustic picture frame. Secure the cardboard backing with a layer of paper backing (not shown) and staple it around the edges. Install picturing hanging hardware as desired. Making picture frames is easy. Right? :-)
Success!
Woodworking Projects - See more woodworking projects on mycarpentry.com.
DIY Projects - Check out more DIY projects on mycarpentry.com.
Outdoor Furniture Plans - Learn about our outdoor furniture plans.
What next?
Leave Rustic Picture Frames and visit our Home Page.