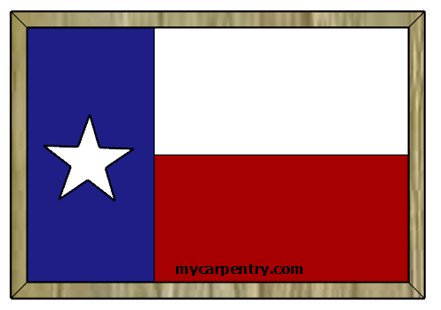
Rustic Texas Flag
The Rustic Texas Flag wall hanging is easy to make and easy on your wallet if you use recycled fence boards. The rustic look of fence boards is perfect for projects like this and helps keep them out of landfills!
Making the Rustic Texas Flag
Before you begin, it is essential to know the dimensions of the elements of a Texas flag. Here are the facts:
- The height of the flag is 2/3 the width of the flag.
- The blue stripe on the left is 1/3 the width of the flag.
- The red and white stripes are 2/3 the width and have equal heights.
- The white stripe is on the top.
- The star diameter is 3/4 the width of the blue stripe and centered from top to bottom and right to left of the blue strip.
I chose antique red, white, and blue for my Texas flag. The eclectic colors matched well with the aged cedar fence boards I used for the frame.
Creating a Template for the Lone Star
When painting the colors on the Texas flag, the red, white, and blue stripes are easy enough, but it is easiest to paint the star on the flag using a template (once the blue color has dried).
As mentioned earlier, the Lone Star on the Texas flag is 3/4 the width of the blue stripe. That is, the diameter of a circle connecting the 5 points of the star is 3/4 of the width of the blue stripe.
A poster board or thin piece of cardboard works well for the template material. Use a compass to draw a circle the diameter you want the star to be. Draw a horizontal line through the middle of the circle, dividing it into two parts. Using a protractor, draw another line 72 degrees from the center point of the horizontal line.
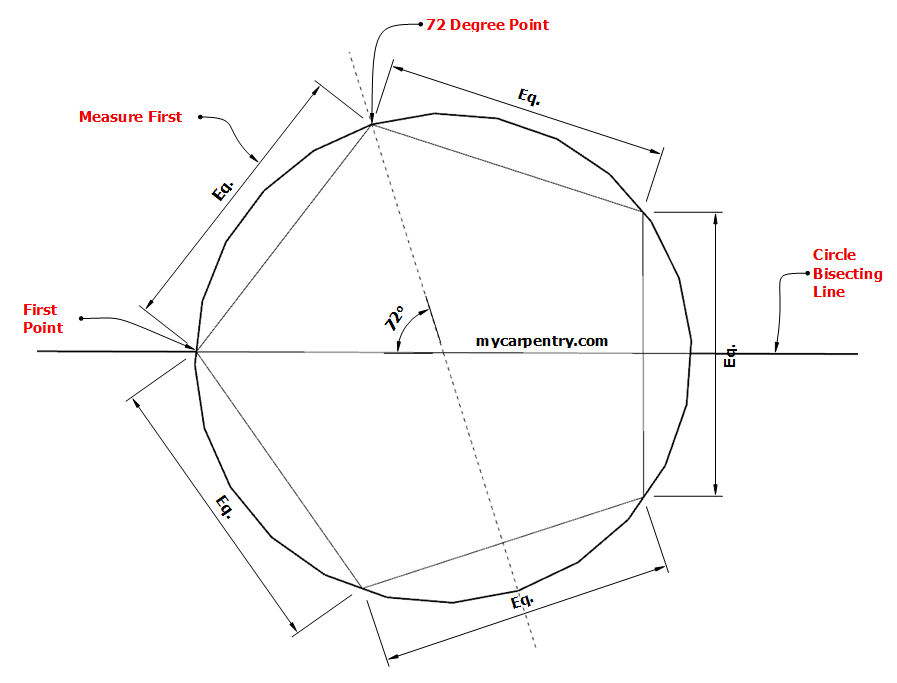
Using a compass as a measuring tool, measure the distance between the point on the horizontal line that intersects with the circle and the point on the circle where the 72-degree line intersects. This distance is the distance between all of the points of the star.
Note: You can lay out the star's five points by drawing five lines at 72-degree angles from the center. (360° divided by 5 equals 72°). Either method described on this page will work.
If you use a compass for the above procedure, you can place the needle on the 72-degree point (or the horizontal point) and, making your way around the circle, mark the remaining 3 points of the star. In the end, all the points should be the same distance apart.
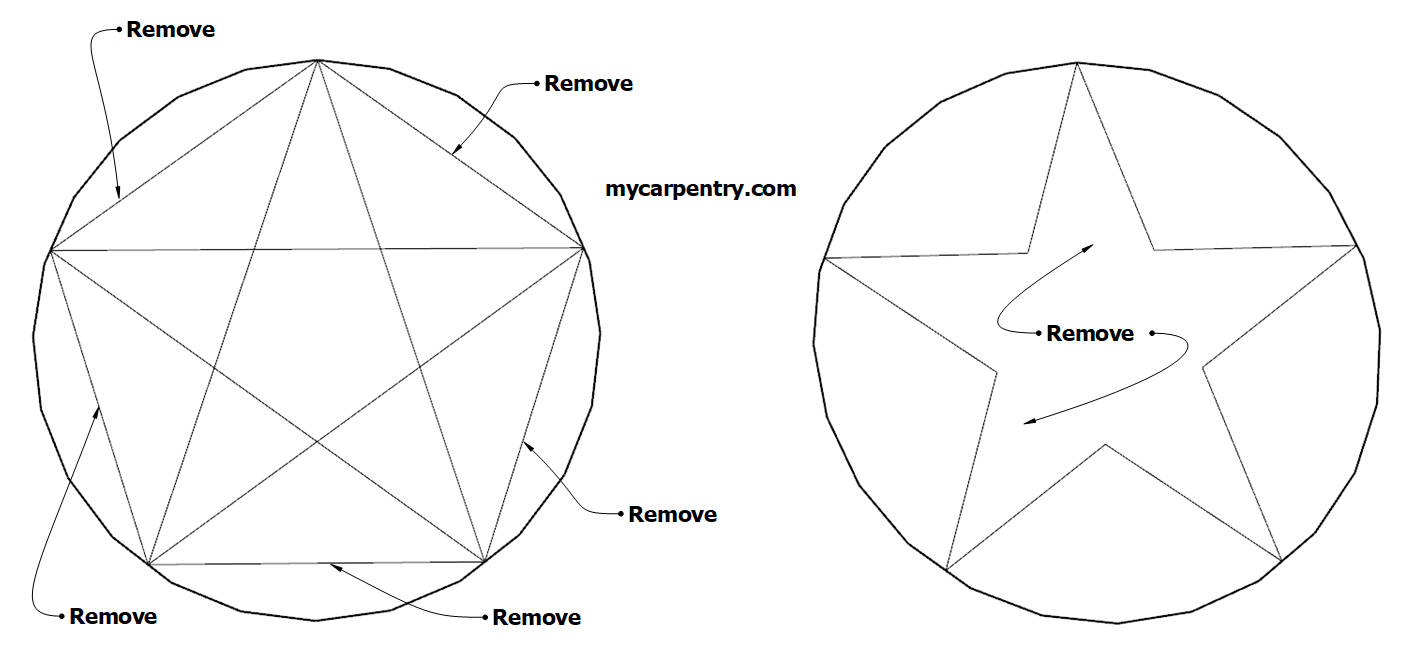
Once you have identified the star's five points, mark lines to connect each point with the two opposing points on the circle (above left). After you draw all the lines, you will see the 5-point star shape appear. Remove the extra lines so you can see the finished shape of the star (above right). Finally, you can use a razor knife to cut out the inside part of the star. You have created the star template.
Building the Rustic Frame
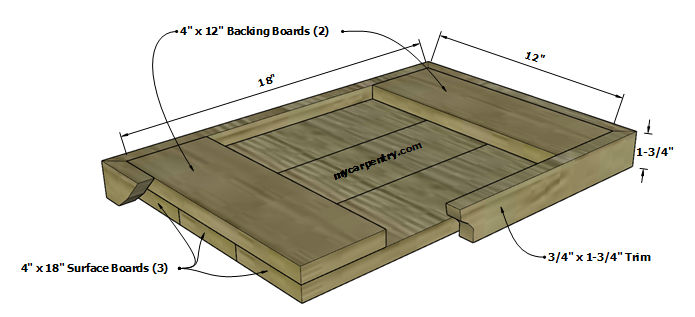
When I built my wall hanging, I had enough fence boards that were exactly 4 inches in width, so I used three side-by-side to create the height of my flag, 12 inches. You can use any combination of fence board widths to make the 12-inch height. The height doesn't need to be exactly 12 inches, just as long as you maintain the 2:3 ratio when you measure the width.
Since the height-to-width ratio of a Texas flag is 2:3, a flag that is 12" high will have a width of 18". Cut three 4-inch wide fence boards (if you have them) 18 inches long. Cut two 12" lengths from another fence board (used on the back side of the flag to secure the three 18" fence boards together).
Fasten the pieces together. Use a pencil to lay out the Texas flag's red, white, and blue sections.
Paint the blue and red sections. Allow the two sections to dry completely.
Center the star template (created earlier) onto the blue stripe and secure it with push-pins to hold it in place. Carefully paint the star using a small brush. Use a small paintbrush and a minimal amount of paint on the tip of your brush to prevent the paint from seeping between the template and the rustic flag surface.
Once you have painted the star, you can remove the star template and paint the remaining white section of the flag (since it is the same color as the star). Allow the paint to dry completely.
Creating the Frame for the Rustic Texas Flag
Rip another fence board 1 3/4" in width to use as the frame around the flag. Use a miter saw to cut the pieces to length and attach them to the flag. Make sure that the back of the frame is flush with the back of the 12" boards used to fasten the three face boards together.
To finish the project, attach a wire or other hanging hardware to the back.
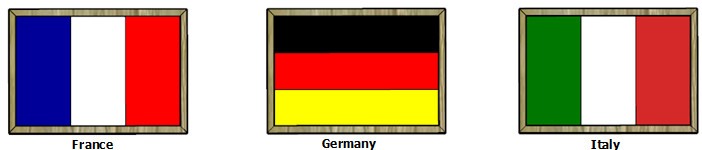
Other Flags
You can use this same plan to create a wall hanging with the flag of your choice. Not all flags have the same 2:3 ratio. You can find the exact proportions online if you want yours to be accurate.
Easy Craft Ideas - Check out more easy craft ideas on mycarpentry.com.
Birdhouse Plans - Check out more birdhouse plans on mycarpentry.com.
Woodworking Projects - See more woodworking projects on mycarpentry.com.
What next?
Leave Rustic Texas Flag and return Home.