Cedar Deck
Designing and Building a Deck using Western Red Cedar
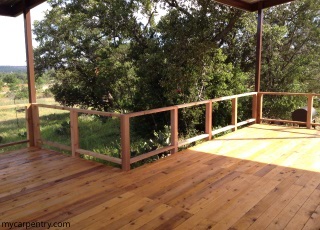
This cedar deck project was very special to me; I have built hundreds of decks over the years, but this was the first deck I designed and built for myself. I was anxious to get started - I could already imagine relaxing on my new deck on a warm summer day with a cold beer, looking over the lake and hills beyond.
Deck Design
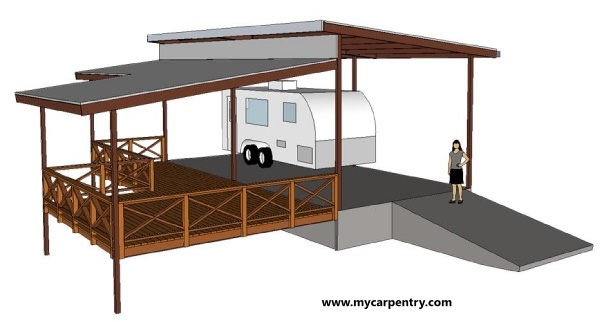
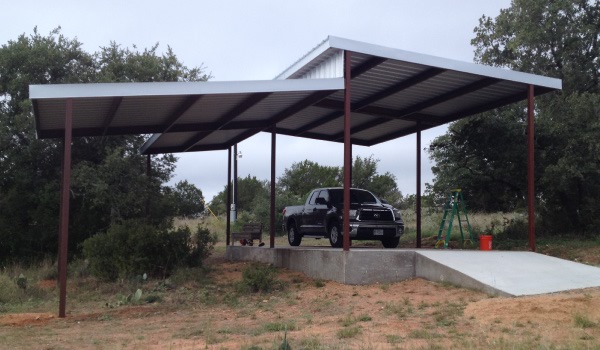
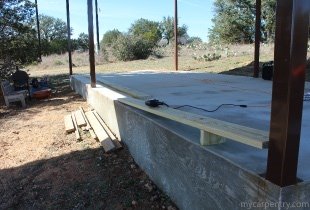
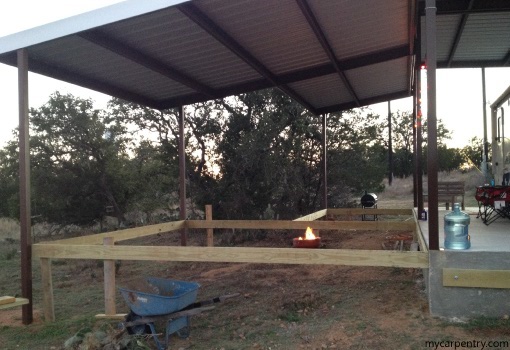
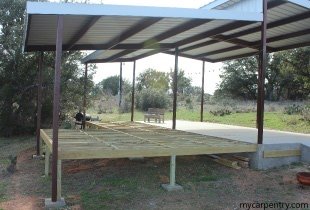
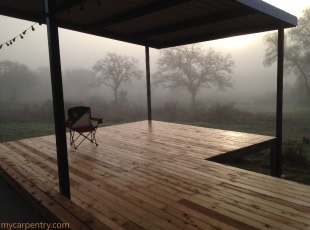
I used Sketchup Pro to design the existing structure (known by us as the RV pad) and the cedar deck. The concrete slab and metal structure had already been built, by a local steel contractor, near the high back corner of our 5-acre hill country Ranchito. It is nested between two clumps of live oak trees and overlooks the entrance to our property and the lake in the distance.
I used pressure-treated pine to construct the deck frame (support posts, beams, and joists) and western red cedar for the decking and railing. All exposed wood was western red cedar, and the underlying structure was pressure-treated pine.
Since the dimensions of this cedar deck were already pre-defined by the existing building, all I needed to do was design a structurally sound deck that would fit between the concrete slab and the support poles of the metal roof.
I wanted the finished deck surface to be the same level as the top of the concrete slab, so there would be no steps or transitions to trip over. I also wanted the deck rail posts to align with the existing support poles. I sketched a detailed framing plan for my new deck to accurately estimate the materials (wood, nails, screws, etc.).
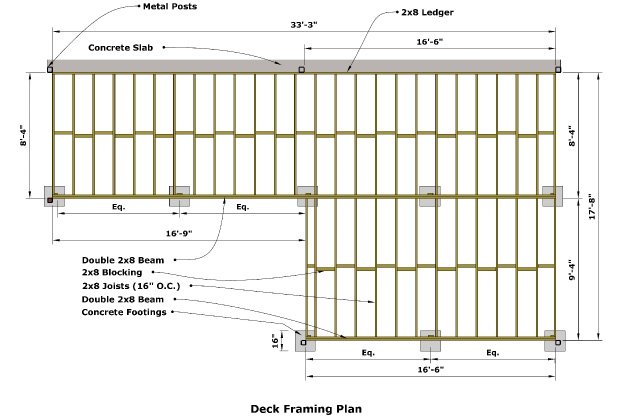
High-Level Deck Framing Plan
Assemble the deck frame first (temporarily supported by 2x8s used as posts). Create the center and front double 2x8 beams by adding 2x8s to the outside of the existing deck frame. Install the 2x8 joists. Level the entire deck frame. Dig footings for the permanent posts. Add the permanent 4x4 posts. Build square concrete forms using scrap 2x8 material and position them under permanent posts. Check and level the frame (again). Fill the forms with concrete. Allow the concrete to harden (one day). Remove the temporary supports and wood forms. Install 2x8 blocking between the joists using scrap 2x8 lumber.
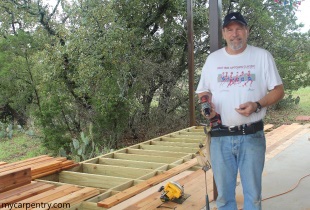
Deck Framing
Attaching the Ledger Board to the Concrete Slab
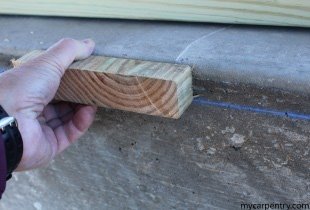
For placement of the ledger board, I measured down, from the top of the slab, 1 1/2" (the thickness of a 2x6 cedar deck board) and made a crows-foot style mark on the front of the slab (at each end) with my carpenter's pencil. Using a chalk-line tool, I stretched the line extra tight between the two marks and popped a 33' blue chalk line onto the slab.
It is a rare privilege to work with a slab that is perfectly level and straight. Mine was certainly not - I had to adjust the height of the frame to compensate for a 1/2" dip in the middle of the slab.
With the chalk line popped (and adjusted for the 1/2" dip), the next step was to attach a 33' long 2x8 pressure-treated ledger board to the front side of the concrete slab. I used three 12' 2x8s for this. I cut them so that, when placed end-to-end, they added up to the 33' ledger that I needed.
Before I attached the 2x8 ledger boards to the slab, I placed them end-to-end and (using a tape measure, speed-square, and pencil) laid them out (16-inch spacing) for the 2x8 floor joists that would be attached to this 33' ledger board once it is in place. With the locations of the joists determined, I also marked the location of the holes needed for each concrete anchor (6" from the end of each ledger-board section and approximately 24" apart).
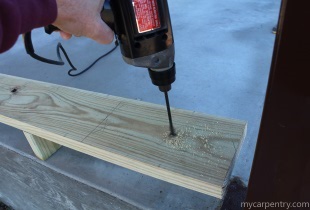
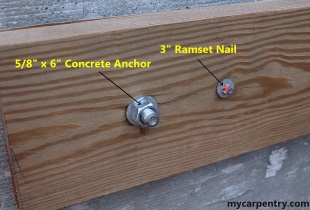
Before attaching the 2x8 ledger boards to the slab, I used a 5/8" wood paddle-bit to drill holes, through the 2x8s, for the 5/8" x 6" concrete anchor bolts. The anchor bolt holes needed to be made before attaching the ledgers to the slab because you can't drill through wood with a concrete bit and can't drill through concrete with a wood bit.
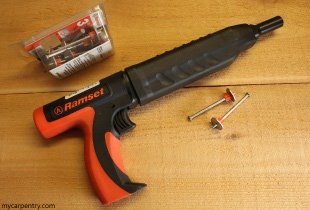
Next, I positioned the first 2x8 ledger board onto the front of the slab, aligned it side to side, held it up to the blue chalk line, and secured it in place using a Ramset and 3" nails.
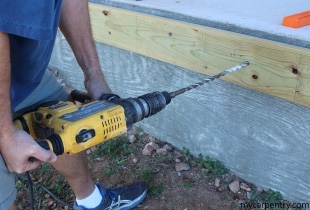
Once the three ledger boards were attached to the slab with the Ramset, I used a Hammer Drill with a 5/8" concrete bit to drill 6 1/2" deep holes into the concrete through each pre-drilled hole in the 2x8 ledger. I wrapped a piece of tape (to use as a guide) around the drill bit 6 1/2" from the end to ensure that my holes were deep enough for the 5/8" x 6" concrete anchor bolts. It is better to make the holes too deep than not deep enough.
A Ramset with 3" nails is perfect for holding the ledger board in position until the concrete anchor-bolts got installed.
After drilling the first concrete hole, I threaded a washer and nut onto the anchor bolt (1/4" past the tip) and drove the anchor bolt, with a hammer, through the ledger board and concrete as far as it would go. I used a crescent wrench to tighten the anchor-bolt nut until the anchor was seated and snug. I repeated the above steps for each of the remaining concrete anchors.
Thread the washer and nut onto the concrete anchors before hammering them into the holes. The hammer can damage the threads, making it difficult to thread the nut later.
Building the Cedar Deck Frame Perimeter
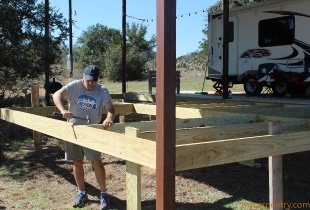
Using the straightest pieces of 2x8 lumber, I built the perimeter of the deck frame before adding the internal structure of beams and joists. I used 16d galvanized spiral-shank nails to connect the beams, floor joists, and wood blocking.
I used my 4-foot level to level each section before supporting it with temporary 2x8 posts. I attached the temporary supports about 18 inches from the permanent support posts so they wouldn't get in the way later.
The metal framing of the existing structure was just about perfectly square, making it easy to build around. But the concrete slab wasn't so perfect - it gradually bowed outwards about 1/2 inch towards the middle. When I added the joists, I measured and cut each one custom, rather than cutting them all the same length, so they wouldn't gradually push out the outer deck frame.
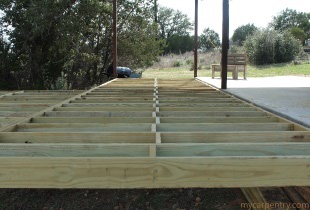
As shown in the deck framing plan, I built a 33-foot double-2x8 beam, supported by five 4x4 piers, to break up the 17-8 span so all the 2x8 joists would be less than 10' in length. There are several reasons for doing this.
Lumber is generally cheaper per foot if you can use shorter lengths. Shorter lengths are also easier to handle than the longer lengths and can be toted in the back of a pickup truck, rather than buying or renting a trailer, or worse, having the lumber delivered that was selected by someone you don't know.
Another reason for using shorter lengths, and perhaps the most important, is design load. The weight a 10' 2x8 can carry is much greater per foot than a 20' 2x8. Without the double-2x8 beam to break up the joist span, I would have to use 2x10s for joists and space them 12" in order to span the required 17' 8".
For this cedar deck project, I only bought the lumber I had time to nail up in a two-day weekend. I nailed joists between every other layout mark to hold the deck frame together and keep the beams from bowing until I could return with the rest of the joist material and complete the framing phase.
When I returned (a couple of weeks later), I discovered my outer beam had bowed slightly outward. I could see a 3/8-inch gap between the end of the joists and the double 2x8 that didn't previously exist. I used a 10' pipe clamp to pull the two beams together to close the gap and used 1/4" x 6" lag screws to keep the beam from pulling away from the joists again.
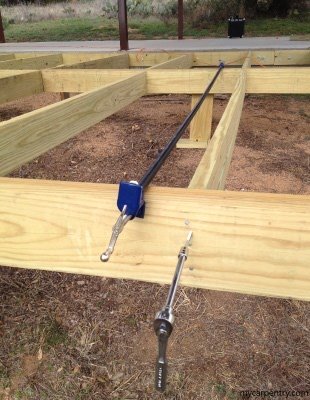
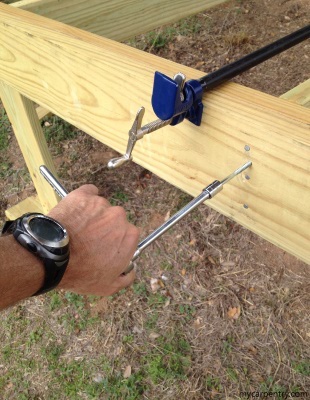
A pipe clamp is a handy tool to have around when building decks. If I had needed a longer clamp, I could have used a coupling to add another section of pipe to the rig.
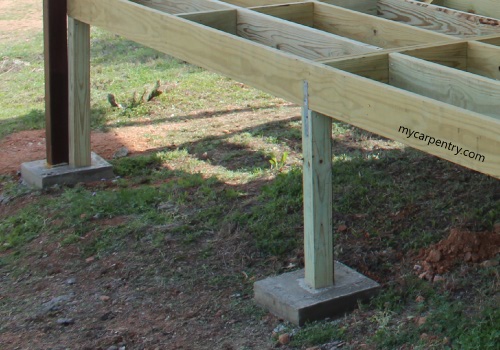
Posts and Footings
I constructed wooden forms for the concrete footings out of scrap 2x8 material. The inner dimensions of the wood forms were 8" deep, 18" long, and 18" wide.
Before putting the forms in place, I dug down to undisturbed earth, which was only a few inches on my project. The soil consisted of packed crushed granite mixed with various size granite rocks.
In Central Texas, I placed my concrete footings just below the surface, but soil conditions vary considerably in different parts of the country and the world. Consult your local building authorities to determine the code requirements for the sizes and depths of deck footings in your area.
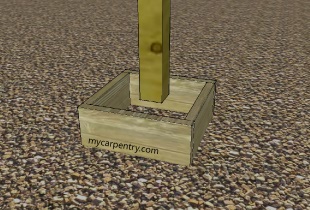
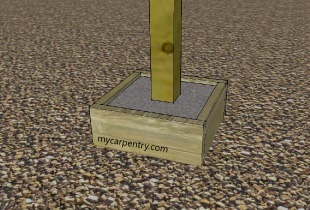
Once the wooden forms were in place, I measured down from the bottom of the deck to the top of each wood form and cut the permanent vertical 4x4 posts about 1/2" longer so that when attached, they would stick down past the top of each one. I cut each post to the desired length and attached them to the bottom of the deck with 16d galvanized spiral-shank nails and galvanized straps.
I purchased the concrete I needed in 60 pound bags and mixed it with water in a wheel barrow. Next, I used a shovel to fill the forms to the bottom of the 4x4 posts.
For more information on footings and piers, visit the deck footings section of Build a Deck on mycarpentry.com.
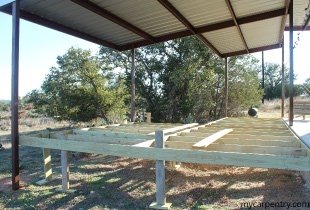
I added the remaining 2x8 joists and used scrap pieces of 2x8 as blocking to keep the joists from bowing. It wasn't a requirement, but it stiffened up the deck frame nicely and was a much better use of the material than sending it to a landfill.
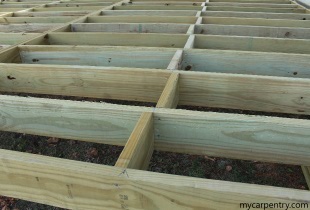
I popped a chalk line down the center of each section of joists and staggered the joist-blocking so that they could be nailed straight in from the side of the deck floor joist.
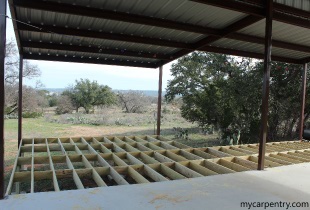
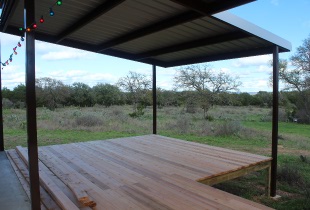
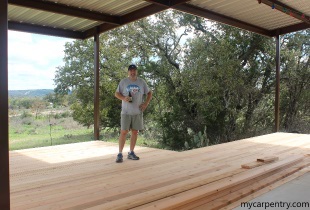
Framing a Deck - Cedar Decking
I used a combination of 18' and 20' western red cedar 2x6s for the decking. The longest width of the deck was 33'. I could have used a combination of 16' and 18' 2x6s to complete the span, but it is good practice (and looks better) to stagger the breaks in the cedar decking at least two joists apart. 16' and 18' lengths could only be staggered one joist apart.
I used my Framing Plan to estimate the quantity of 18' and 20' deck boards to purchase. I added a few extra 18-footers for the handrail and another 10% (for waste) because I was having the lumber delivered. I figured there would be a few ugly ones I wouldn't want to use on the deck but could be used to construct custom benches or other outdoor furniture.
The cedar decking arrived on a Saturday morning wet. In fact, it was raining while I helped the driver unload the lumber onto the outer deck frame. I separated and stacked the boards by size and pulled out a few of the best-looking ones for the handrail.
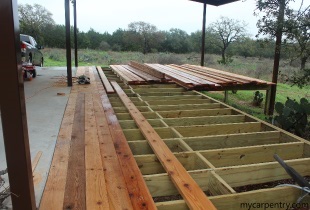
Most of the lumber was straight, and only a few planks had large knots. To ensure the first few rows of decking were perfect, I started with 10 of the straightest 2x6s I could find. With my circular saw, I squared off the inside end of the planks and let the other end run past the edge of the deck (to be cut later).
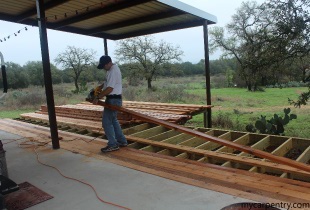
I purchased 3" Star flat-headed deck screws to fasten the 2x6 cedar planks to the pressure-treated joists. The box of screws came with a new Star drive bit that I used with my Milwaukee cordless drill to install the cedar decking.
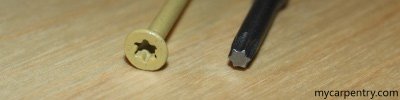
The cordless drill and Star-drive combo worked perfectly. I was surprised the ar drive lasted the duration of the project. Each new box of screws came with a new Star drive - needless to say, I have plenty of spares.

After I laid a few rows of decking, I randomly mixed in a few of the planks that were a little crooked. I used a hammer and wood chisel to pry the deck board snug against the last row of decking, until I could screw the plank down with the cordless drill in my other hand.
It is good practice to blend the crooked boards in with the straight ones. You don't want to have anything but bowed lumber to deal with when you lay the last few pieces of decking.
Once all of the decking was down, I trimmed the overhanging planks so that they overlapped the deck frame by 1 1/2" - I marked both ends of each section with a pencil and popped a chalk line between the two marks to use as a guide for my circular saw.
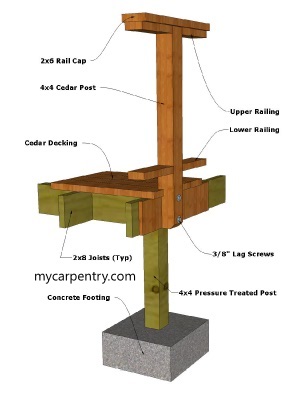
Deck Railing
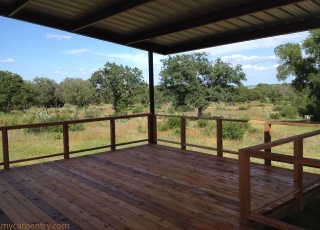
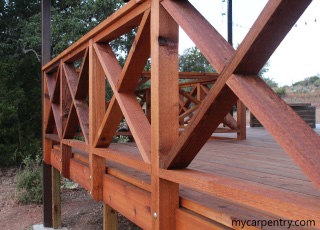
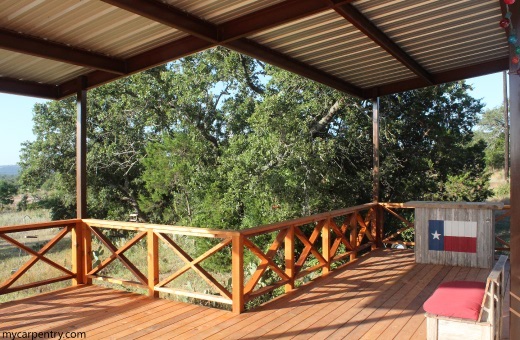
There are many deck rail designs. Each of them has its advantages and disadvantages. For this deck, we chose a ranch-style crisscross design. This style is easy to build but would not pass the building code without adding wire mesh to one side so that a 4-inch sphere could not pass through.
The deck railing page on mycarpentry.com shows an example of a code-compliant design.
The code (DCA6 Prescriptive Residential Wood Deck Construction Guide) states that an object 4" or larger in diameter should not be able to pass through any part of the railing. It also states that deck railing is not required if the deck height is less than 30" above grade. If a rail is required, it must be at least 36" above the deck surface.
Many sections of my cedar deck did not require railing for safety, but I wanted it to have something to lean on and plenty of places to park my beer when not drinking it.
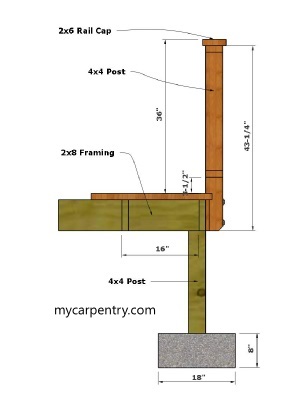
When I laid out my deck for rail post placement, I calculated each span separately. Since the spans between steel roof support poles vary, the distances between the individual rail posts varied. The span on the front section is 14" less than the neighboring side.
Each span has the same number of posts, making them closer together on the front than on the side. Do you notice the difference? Neither did we. :-)
As long as the space between posts, in any one span, is the same, it will look pleasing to the eye.
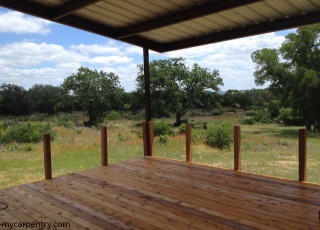
Since the cedar decking overhung the deck frame 1.5 inches on every side, I notched the decking at the location of each 4x4 post with a jigsaw.
I cut the 4x4 cedar rail posts to length (43 1/4"), so when attached to the deck frame, the top of the post would be 34 1/2" above the surface of the cedar deck, and the bottom end would be flush with the bottom of the deck frame. I cut a 45-degree notch at the bottom of each post for looks, but it is not required.
I toe-nailed the rail posts in place with 8d nails and checked them for plumb. I drilled two 1/2" diameter holes through the 4x4 cedar posts and pressure treated framing, and bolted them together with 3/8" galvanized carriage bolts.
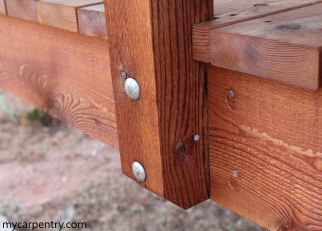
After completing the installation of the crisscross-style railing, I trimmed the outside of the 2x8 pressure-treated framing with 1x8 cedar, thus covering up the remaining visible pressure-treated framing material.
I cut the 2x6 rail cap sections to length - from the lumber I previously set aside for this purpose - and fastened them to the 4x4 rail posts using the same 3" wood decking screws.
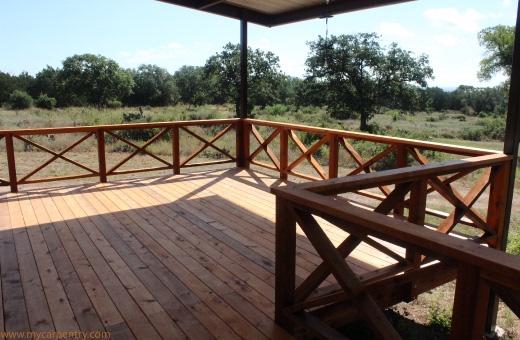
When I finished the deck, I sealed all the cedar surfaces with PENOFIN Penetrating Oil Finish - Western Red Cedar. I found the coverage to be better than indicated on the gallon-sized can.
I have worked with western red cedar for years and find it an excellent choice for deck and patio cover material, but it requires periodic sealing to prevent decay. You will know when it needs another coat. After about six months, my deck had faded slightly but was still well-preserved.
I expect the second sealing to last at least two years and the third sealing to last at least five years.
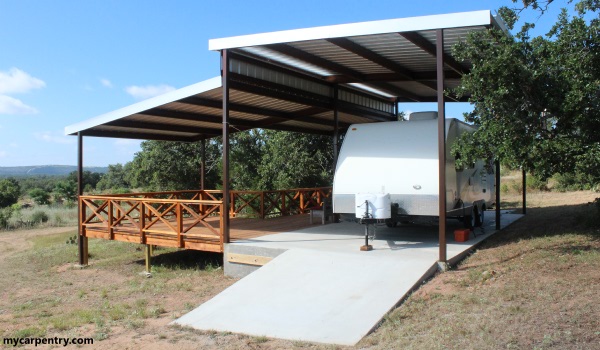
It has been almost a year since I began building the cedar deck project. It took about five months of random weekends to get the job done. It was a fun project and has added about 500 square feet of outdoor-room space to the existing RV pad. We hope to spend many years of fun and relaxation on our new cedar deck!
Build a Deck - A seven-part tutorial on how to build a 10x10 deck.
Carpentry Tools - Find tools used for building decks.
Patio Cover Plans - How to build a patio cover.
Building Decks - Read my story about building 200 decks.
Check out the Prescriptive Residential Wood Deck Construction Guide by the American Wood Council.
What next?
Leave Framing a Deck and visit our home page.