Build an Archway
Build an archway - two simple methods for creating an arch for the inside of your home to accent a hallway or entryway.
You can create a simple, non-structural arch shape using either of two methods. The first is to create an elliptical arch using the arch calculator.
Build an archway using the results from the Arch Calculator
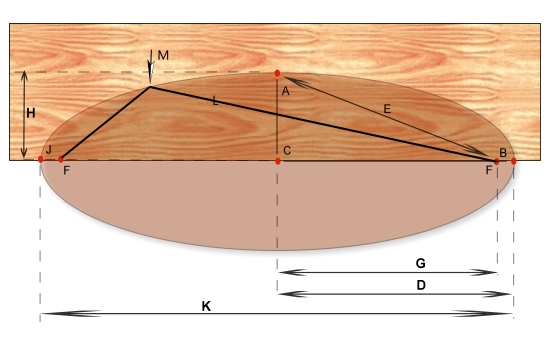
Once you have calculated the location of the focus points using the arch calculator, you now have the information you need to lay out your arch. Perform the following steps using the Arch Diagram below for reference:
- Locate points J, A, C, F, and B on your arch material.
- Drive a nail into points J and B (this is the total width of the arch).
- Tie a tight string around points J and B.
- Remove the string from points J and B.
- Remove the nails from points J and B.
- Drive a nail into both focus points (F).
- Place the loops on each end of the string (represented as 'L' in the diagram) onto both focus points (F).
- Starting at point J, you can now draw the shape of an ellipse using a pencil (M) and the loose string (L) as a guide.
The second method is to make something that you can bend to the shape of an arch to use as a template. To do this, rip a 1/4 inch wide strip of wood off a piece of 3/4 inch thick lumber, the same length or longer than the horizontal span of your desired arch.
Pick out a piece of scrap board that you won't use for any other purpose to create the template. The goal is to create an arch template that is thin enough to bend without breaking and thick enough to bend without breaking.
The 1/4-inch material is pliable enough to make a smooth arch shape (you may need to make it a little thinner or a little thicker, depending on the flexibility of the species of wood you are using).
Place it on the board (as shown in the diagrams), bend it to the desired shape, mark the outline with a pencil, and use a jigsaw to cut it. After you cut the first arch, use it as a template to create the other parallel part of the arch.
Building the Archway
You can use 2x4 framing to attach the two pieces shown in the diagrams. The 2x4s define the depth and structure of the arch and serve as nailers for wall covering material.

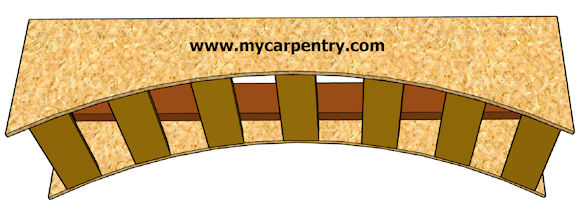
Besides 2x4s, you can use any 2x material for framing an arch. You can also use plywood or wafer board for the arch shape. The images below show an example of a shallow and a deep archway.
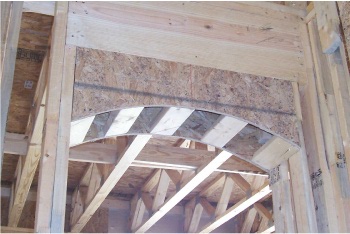
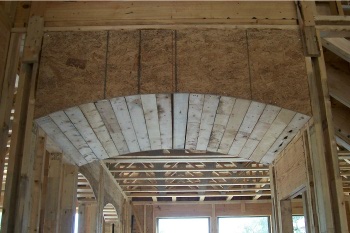
2x4 framing sandwiched between pre-arch-shaped plywood is an accepted method of building a non-structural decorative arch.
What next?
Leave Build an Archway and return home.