Framing a Door
Framing a door depends on the type of door you want to install, but there are framing techniques that apply to most doorways. This tutorial will explain the parts of a framed rough opening and guide you through the basics of door installation.
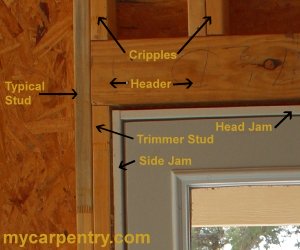
The door in the image below shows part of a pre-hung door already installed in the rough opening.
Framing a Door's Rough Opening
Framing a rough opening means adding about 1/2 inch of clearance between the wood framing and door jam on the top and both sides of the pre-hung door. When you purchase a pre-hung door, the door's rough opening size will be in the door's specifications. The gap between the framing and the door provides room for fine-tuning the door position before securing it in place.
You can determine the size of the rough opening by measuring the actual width and height of the pre-hung door and adding 3/4 inches to the width measurement and about 5/8 inches to the height measurement - this will be the rough opening.
During the door installation, you will use shims to fill the gap between the door jam and the rough opening and 16d casing nails to hold the pre-hung door in place.
Determine the Length of the Header
Once you have determined the width of the rough opening, add three inches. That will be the length of the header. The extra three inches is because the door header will rest on the top of the two 1-1/2-inch trimmer studs (see the Typical Wall Section diagram).
Use the following table to determine the maximum allowable length for a given header size. For instance, a double 2x12 header can span 12 feet if the wall supports just the ceiling and roof of a single-story house. The same 2x12 header can only span 9 feet if supporting a second floor, plus the ceiling and roof.
| Material | Supporting one floor (ceiling and roof) | Supporting only ceiling and roof |
| 2 x 4 | 3' 0" | 3' 6" |
| 2 x 6 | 5' 0" | 6' 0" |
| 2 x 8 | 7' 0" | 8' 0" |
| 2 x 10 | 8' 0" | 10' 0" |
| 2 x 12 | 9' 0" | 12' 0" |
Building the Header
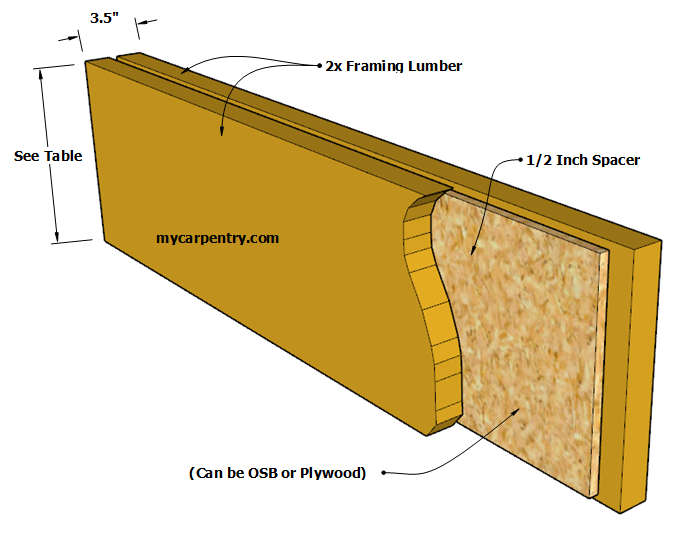
In the table above, the material column refers to two 2x12s on edge with pieces of 1/2" plywood spacer sandwiched between. This will make the header 3.5" thick so that it fits flush on both sides of a standard 3.5-inch wall.
The length and height of the header will vary based on load and size requirements. Secure the parts together with 16d common nails.
In typical residential structures, the height of the rough openings for doors is usually the same, thus making framing easier since you can cut all the trimmer studs the same length.
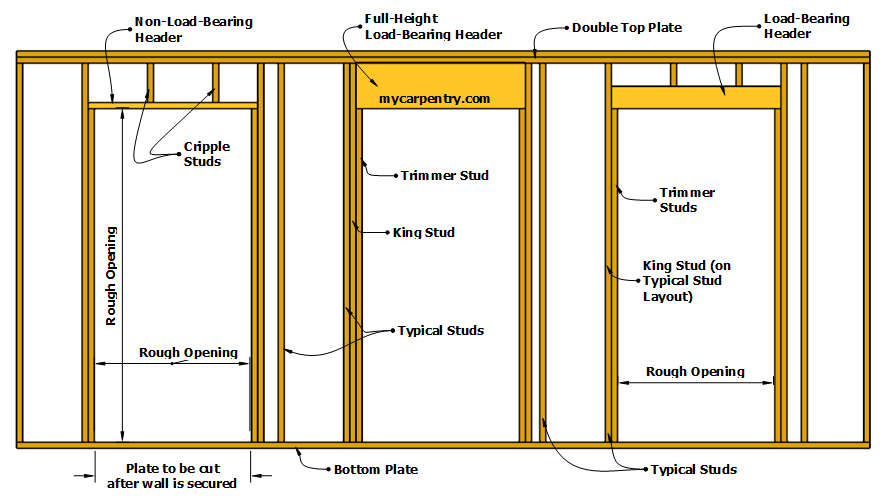
The above wall section is only an example of wall framing. Although possible, it is unlikely that you would have a wall that has a load-bearing header and a non-load-bearing header.
I have worked on residential projects where the builders use double 2x12 headers for all doors and windows regardless of the size of the opening because, for typical 8' ceilings, the double 2x12 header fits snugly under the double plate, so you don't have to add cripple studs in the space between the top of the header and the bottom of the double-plate.
Doorways in Basement Walls
Since the ceilings are supported in most basements by existing posts and beams, you can build non-load-bearing walls with non-load-bearing headers for interior partition walls in a basement.
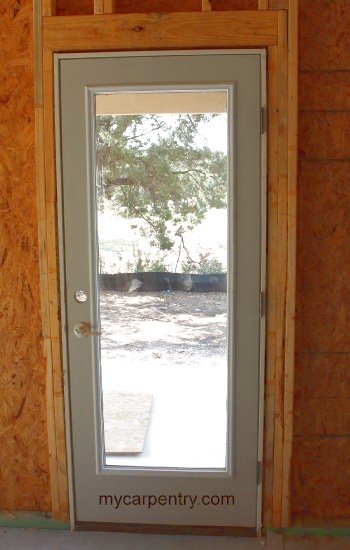
The diagram below shows a pre-hung door installed in the rough opening. You can use any material that you want to shim the door. Use a slightly tapered shim material, like a cedar roof shingle. It will make adjusting the gap between the framing and the door jam much easier. You can tap the tapered material to the exact thickness you need.
Once the door is in place, use 16d casing nails to secure the door.
If you have any specific questions about framing a door or door installation, please don't hesitate to contact us.
Framing a Wall - Learn how to build walls for residential construction.
Floor Framing - How to construct a floor for residential construction.
Framing a Roof - Learn about framing Gable and Shed roofs.
What next?
Leave Framing a Door and visit the home page.