Outdoor Bench Plans
How to build a wooden bench from old fence boards
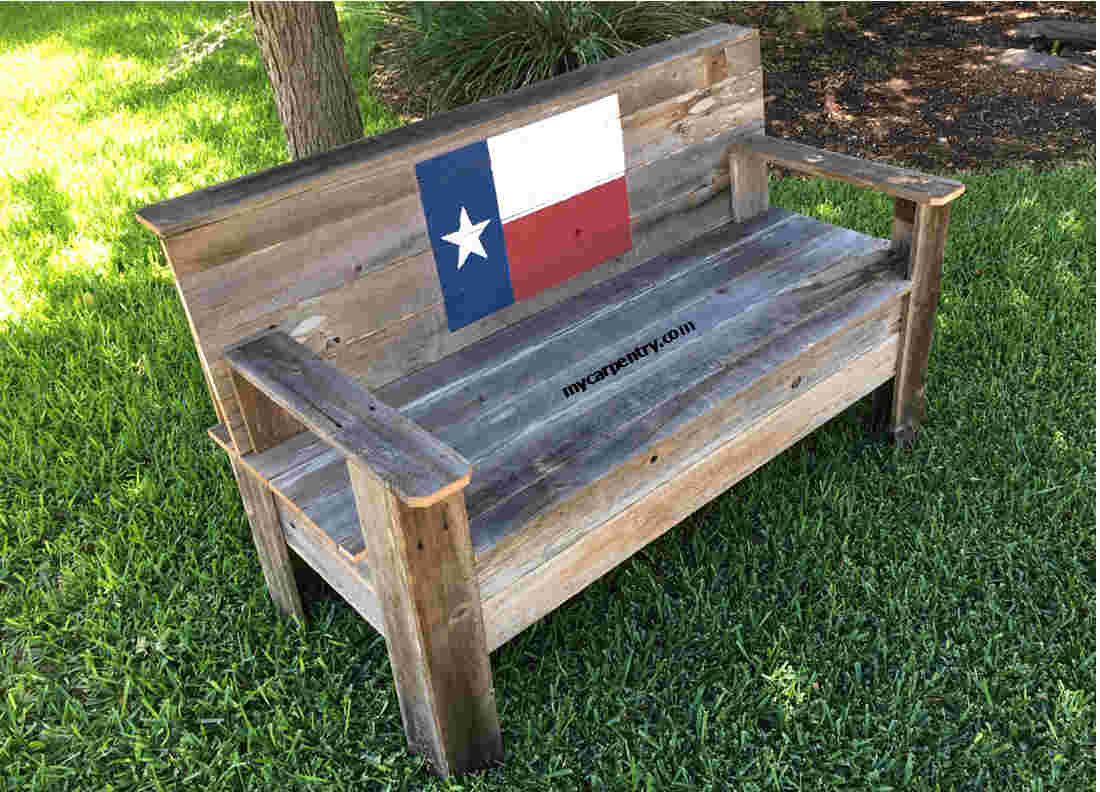
These outdoor bench plans will show you how to build a rustic wooden bench with back and armrests. I constructed this outdoor bench from cedar fence boards I salvaged after replacing my 20-year-old privacy fence. I like the idea of using recycled building materials for my woodworking projects. You can save money on your new one-of-a-kind crafts by not having to purchase new lumber for them. Building a beautiful wooden bench for my yard was a much better use for the fencing material than sending it to the already overflowing landfill.
The fence boards used in these plans were almost exactly 4 inches wide and 3/4 inches thick. The material list and bench plan dimensions take this into account. Verify your material dimensions and make any necessary adjustments to the plan before you start cutting the pieces.
Of course, you can make your bench any size you desire and customize the decorations to suit your unique tastes.
Outdoor Bench Plans (Materials List)
| Description | Size | Quantity |
| The frame (front and back) | 1x4x48 | 4 |
| The frame (sides and center) | 1x4x21 | 8 |
| Frame blocking | 1x4x8 | 8 |
| Two-Piece Legs (front) | 1x4x23.25 | 4 |
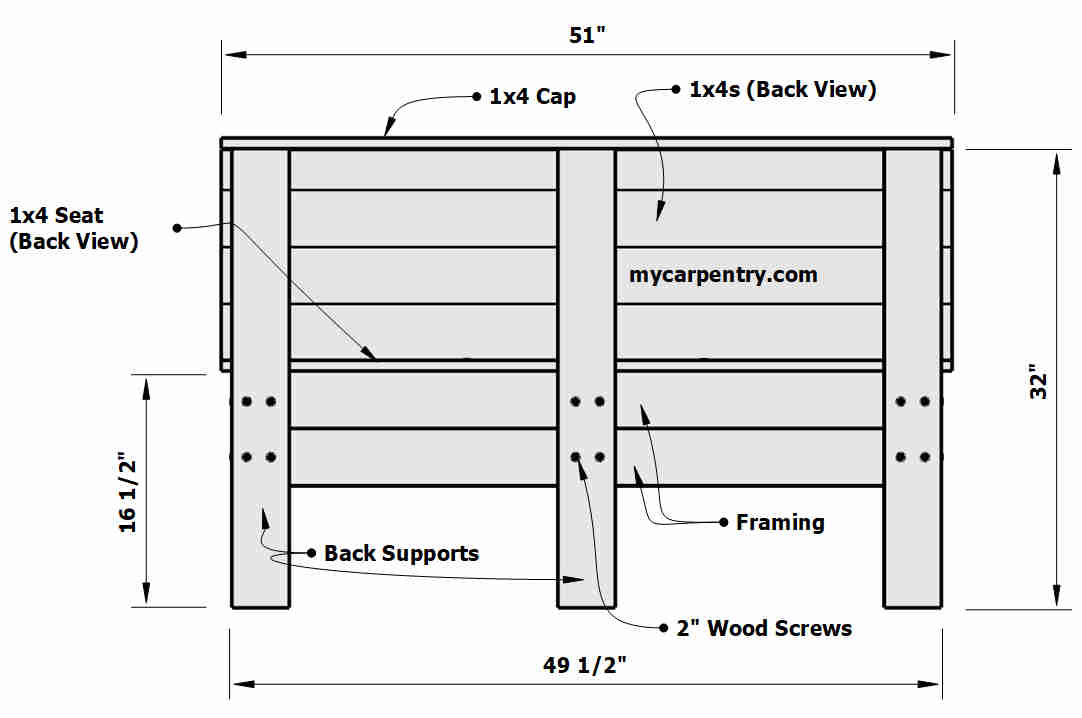
| Legs/Back Supports | 1x4x32 | 3 |
| Rear Side-legs | 1x4x16.5 | 2 |
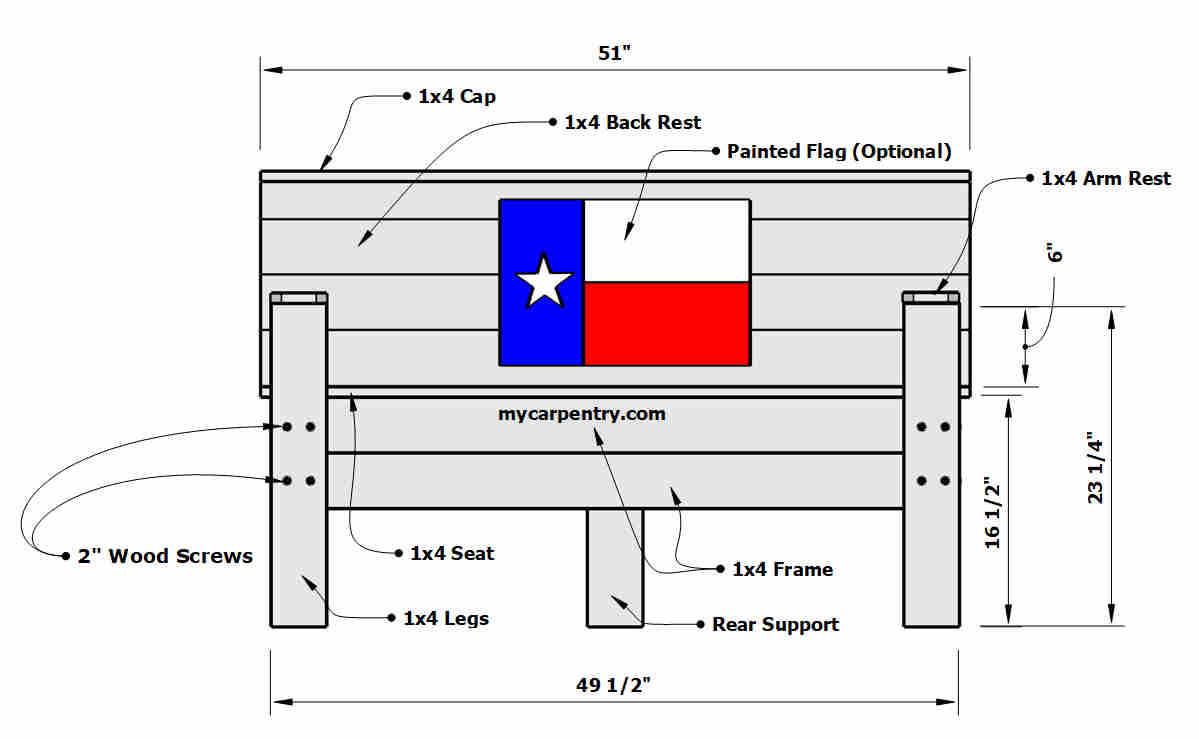
| Seat | 1x4x51 | 6* |
| Back | 1x4x51 | 4 |
| Tapered Seat Back | See diagrams | 3 |
| Seat Cap | 1x4x51 | 1 |
| Rear Arm Rest Supports | 1x4x6 | 2 |
| Arm Rests | 1x4x21 | 2 |
* To provide about 1 1/2" of seat-board overhang on the front of the bench, I made the finished depth of the frame 22 1/2" deep so that once attached to the frame, the six 4-inch wide seat boards (measuring a total of 24 inches) would produce the planned 1 1/2" overhang.
Note: I used 16-gauge 2-inch galvanized Porter Cable finish nails to attach all of the pieces of this outdoor wooden bench. Once I completed the bench assembly, I reinforced the corners and other structural parts with 2" wood screws, as indicated in the drawings. It is acceptable to use different fasteners to build this bench. The reinforcement you might need is somewhat of a judgment call based on the quality of your repurposed fencing or other material.
Building the Outdoor Bench Plans
Assemble the two box sections of the frame using the materials indicated in the materials list and the diagrams below.
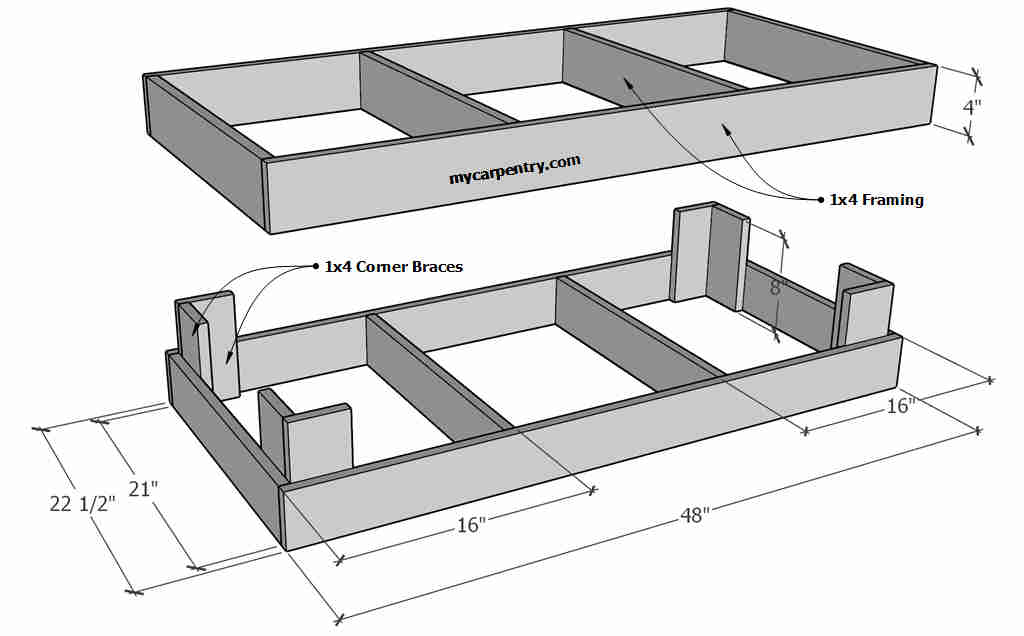
Place one section on top of the other and secure them together using the eight 8-inch corner braces placed on the inside corners of the two sections (see diagram above)
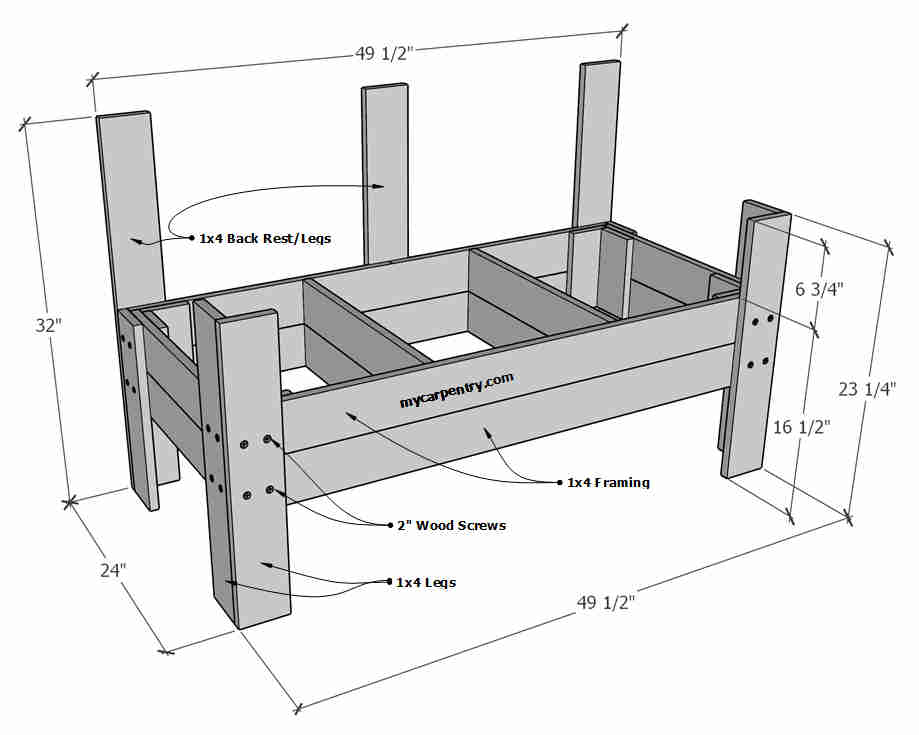
Attach the front and rear legs, plus the back supports, to the frame as indicated above and in the bench elevations near the bottom of this page.
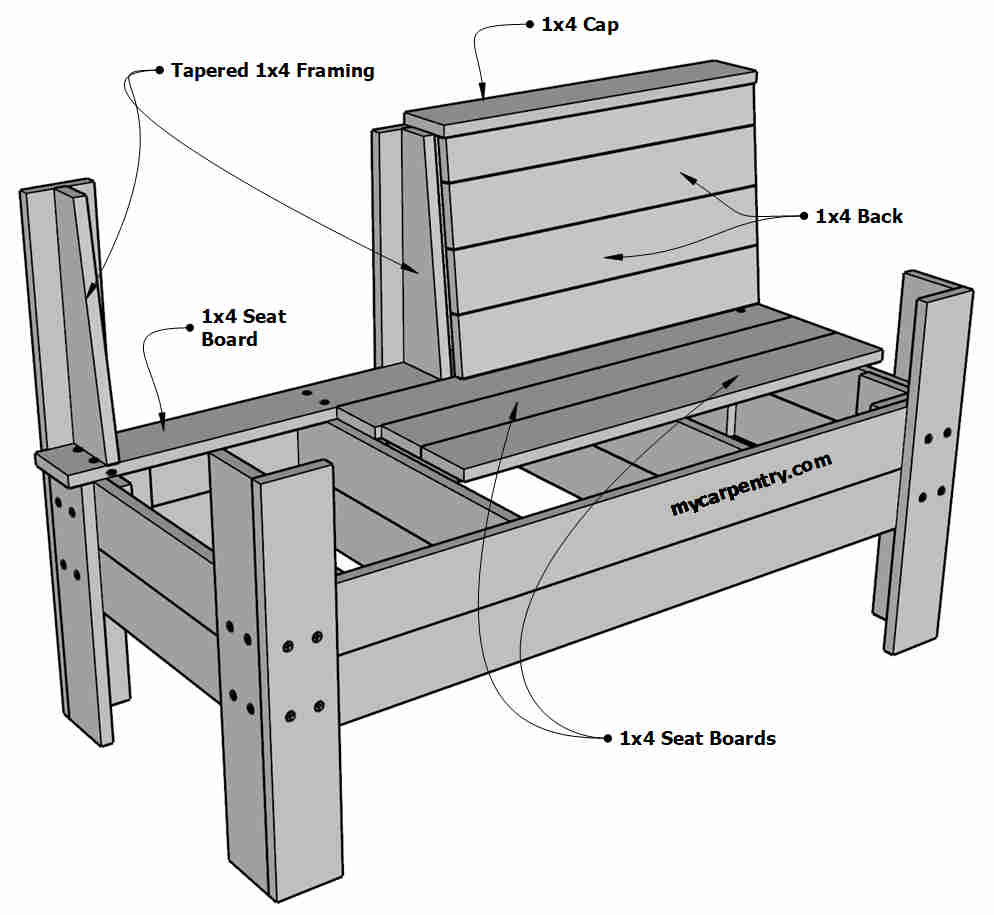
Add the seat-boards starting from the rear of the bench frame, working toward the front of the bench. Center each board so that the overhang is equal on both sides.
Once the seat-boards are secured, add the tapered back pitch-boards to the back supports, as shown above, and the side view diagram shown below.
Next, add the 1x4 backrest boards to the tapered backrest framing, without any space between them, starting at the bottom, just above the seat boards. Leave an equal amount of overhang on each side of the bench.
Note that the top 1x4 may need to be ripped to size so it does not extend above the back of the bench framing.
Next, add the 1x4 cap to the top of the backrest, holding it flush with the backrest boards, as shown in the diagrams.
Outdoor Bench Plans - Elevations
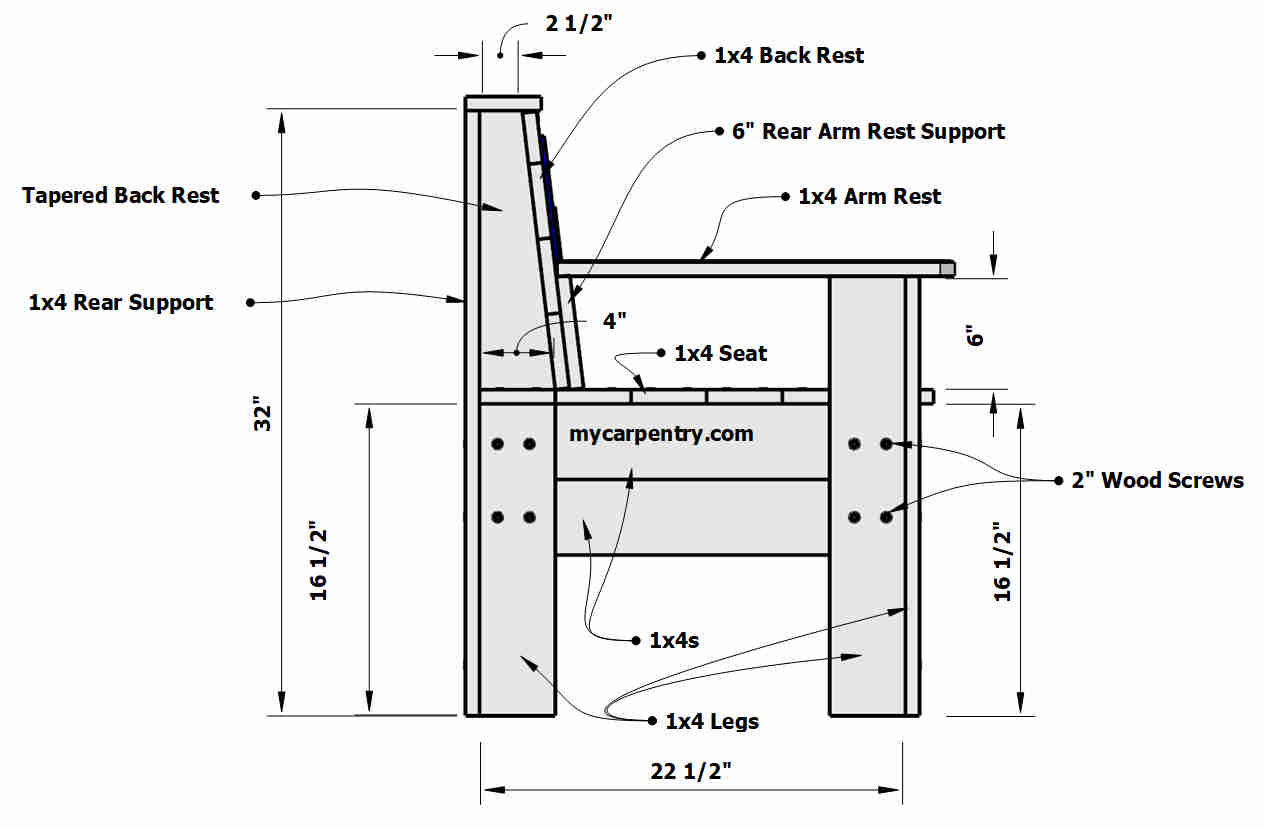
Finally, attach the two 6-inch rear armrest supports to the face of the backrest boards. Next, attach the two armrest boards as shown in the diagrams.
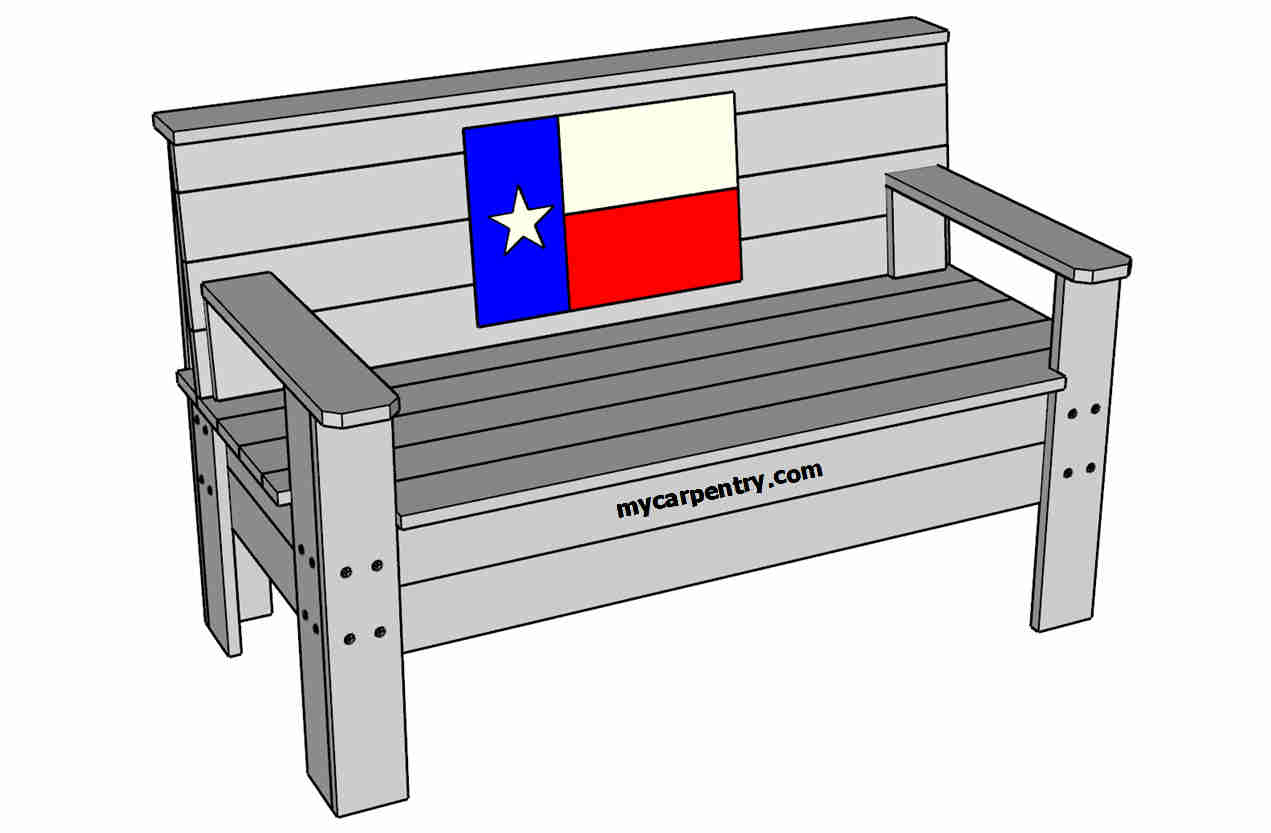
The Texas Flag
The Texas flag is one of the simplest state flags to draw. The three rectangles that make up the flag are proportionally the same size. They are each twice as long as they are wide. The diameter of the 5-point star is 3/4 of the width of the blue section and centered from top to bottom. The white rectangular part of the flag is above the red. I used "antique" colors for my Texas flag to give it an aged look.
Building a Wooden Privacy Fence - Build or replace your privacy fence and save money!
Carpentry Tools - List of essential carpentry tools used by carpenters.
Woodworking Projects - List of woodworking projects you can build in a day.
Rustic Texas Flag - Rustic Texas flag project using old fence boards.
What next?
Leave outdoor bench plans and visit our home page.